🚀 05. Elastic Beanstalk
This guide provides step-by-step instructions to create a simple Elastic Beanstalk application (Node.js web server) using the AWS Management Console.
🪜 Step-by-Step Setup
Step 1: Open Elastic Beanstalk
- Go to AWS Console → Services → Elastic Beanstalk.
Step 2: Create a New Application
-
Click Create application.
- Enter an application name (e.g.,
MyApplication).
- Enter an application name (e.g.,
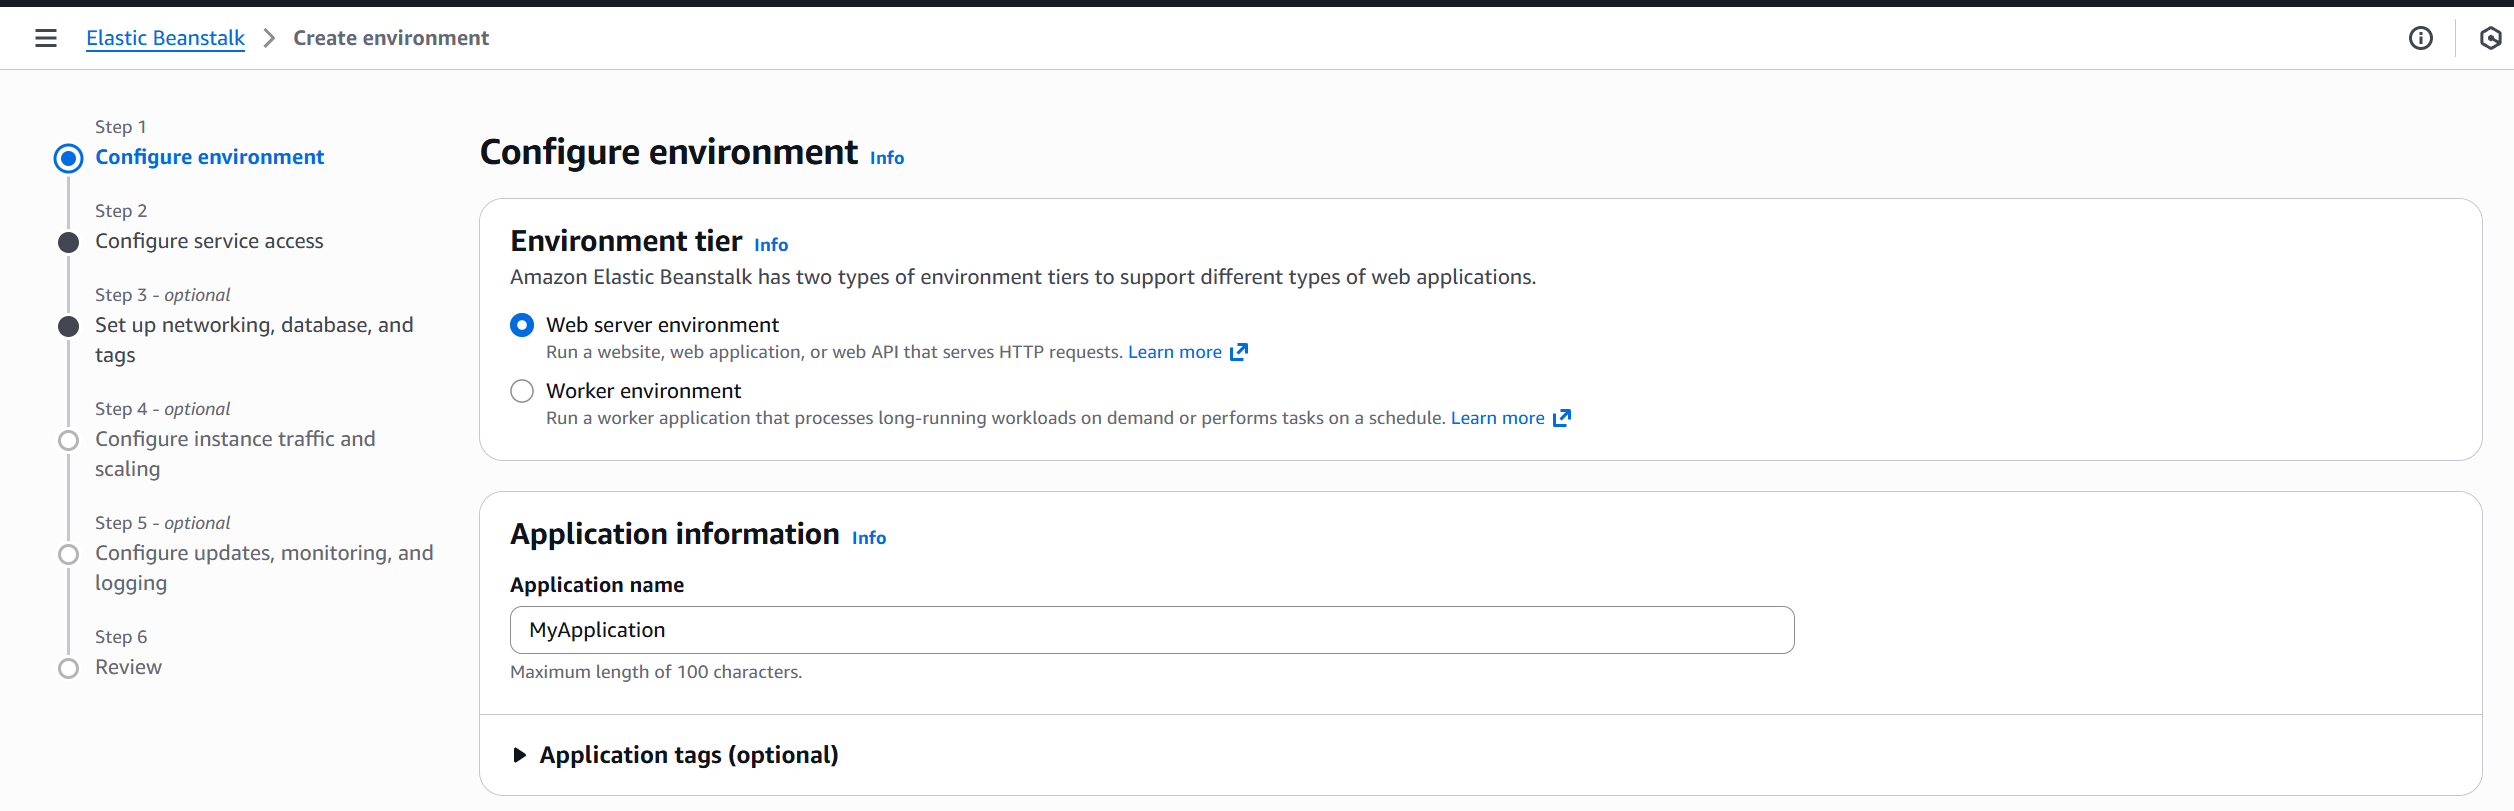
Step 3: Choose Environment Type
- Select Web server environment (for web apps).
- Click Create environment.
Step 4: Configure Environment Information
- Enter an Environment name (e.g.,
MyApplication-dev). - A domain name is auto-generated for access.
Step 5: Choose Platform
- Select Node.js as the platform.
- Leave defaults unchanged unless specific requirements exist.
Step 6: Upload Application Code
- Under Application code, select Sample application.
- This deploys a sample Node.js app automatically.
Step 7: Select Environment Configuration
- Choose Single instance (Free Tier eligible).
- Optionally choose:
- High availability → Load Balanced setup.
- Custom configuration → Advanced options.
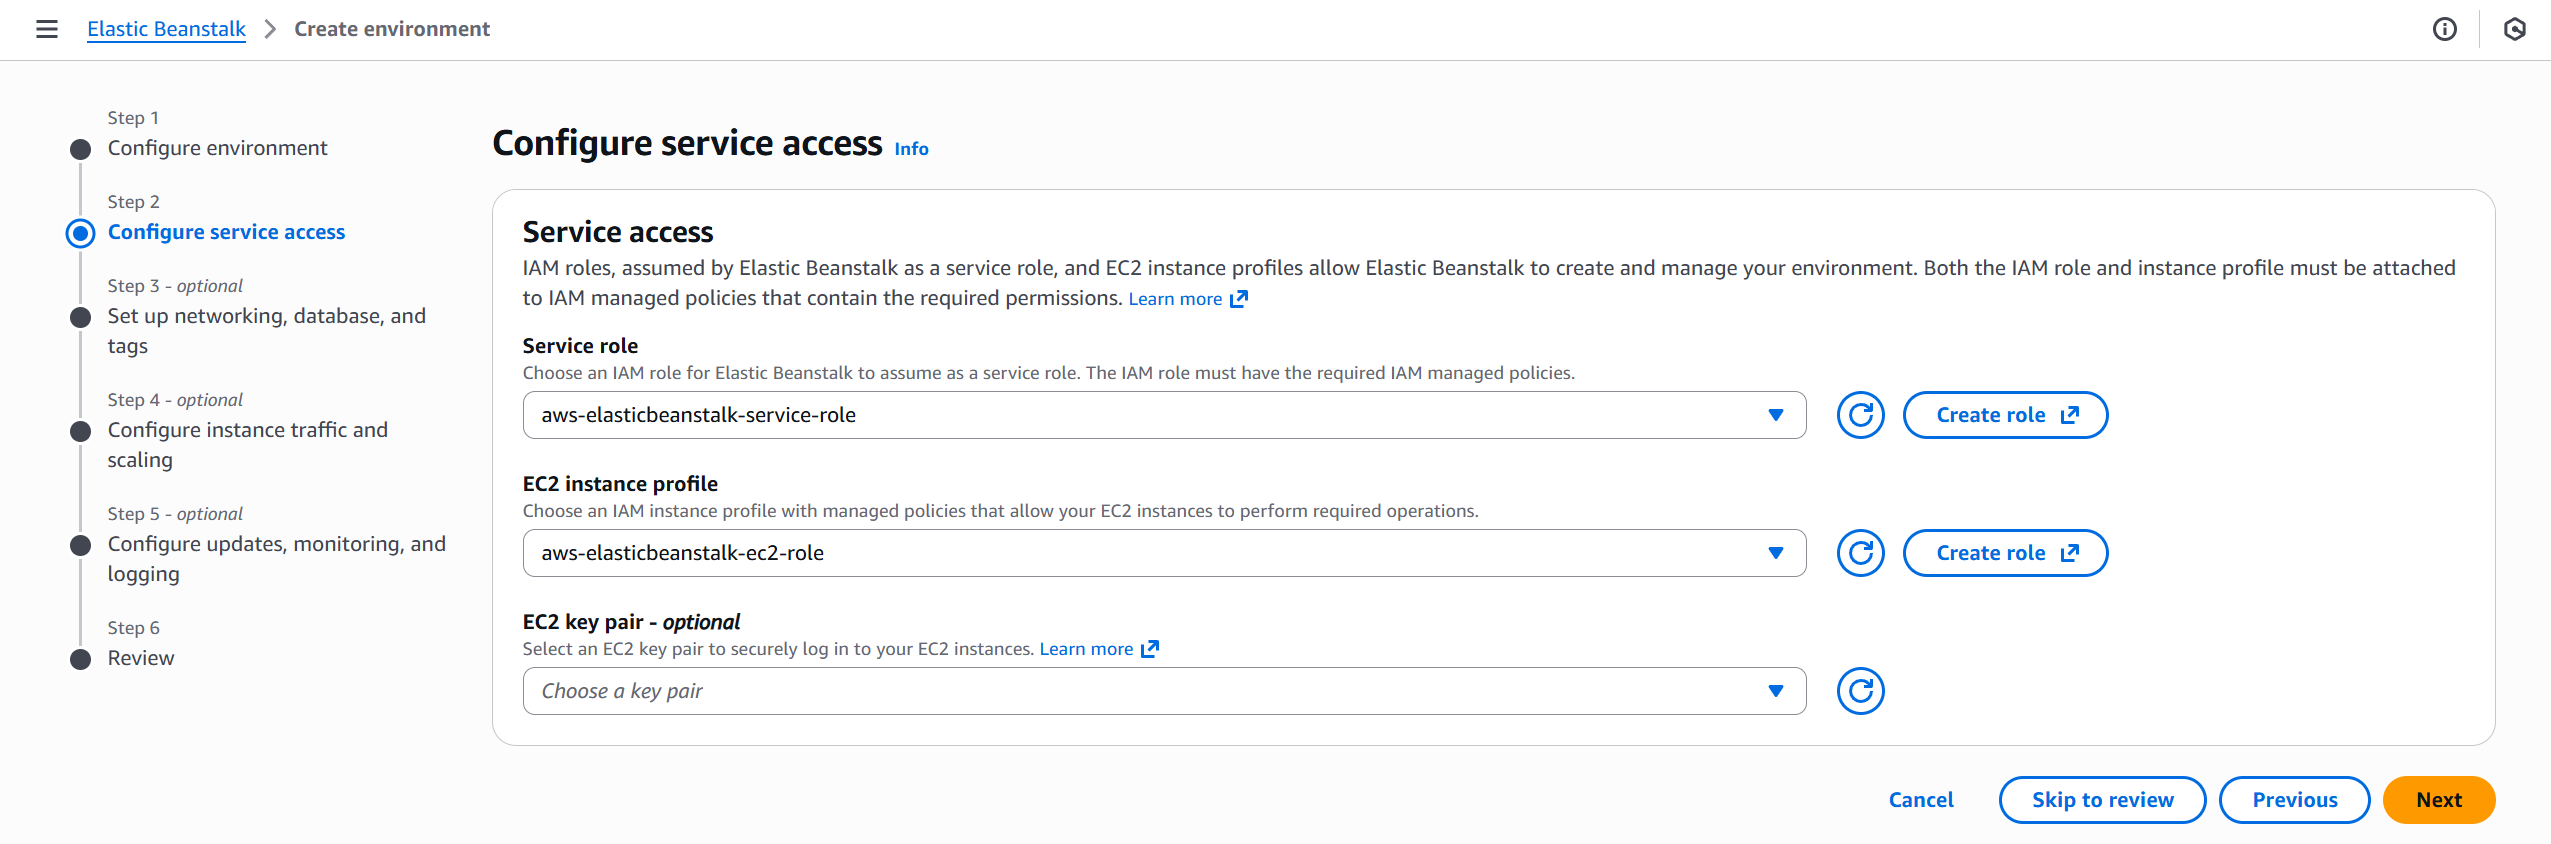
Step 8: Configure Service Access (IAM Roles)
Elastic Beanstalk needs:
- Service Role:
elasticbeanstalk-service-role(To create Resources) - EC2 Instance Profile:
aws-elasticbeanstalk-ec2-role(EC2 to AWS communication)
If missing:
- Go to IAM Console → Roles → Create role.
- Choose AWS service → EC2.
- Attach policies:
AWSElasticBeanstalkWebTierAWSElasticBeanstalkWorkerTierAWSElasticBeanstalkMulticontainerDocker
- Name the role:
aws-elasticbeanstalk-ec2-role. - Return to Beanstalk and refresh to select the new role.
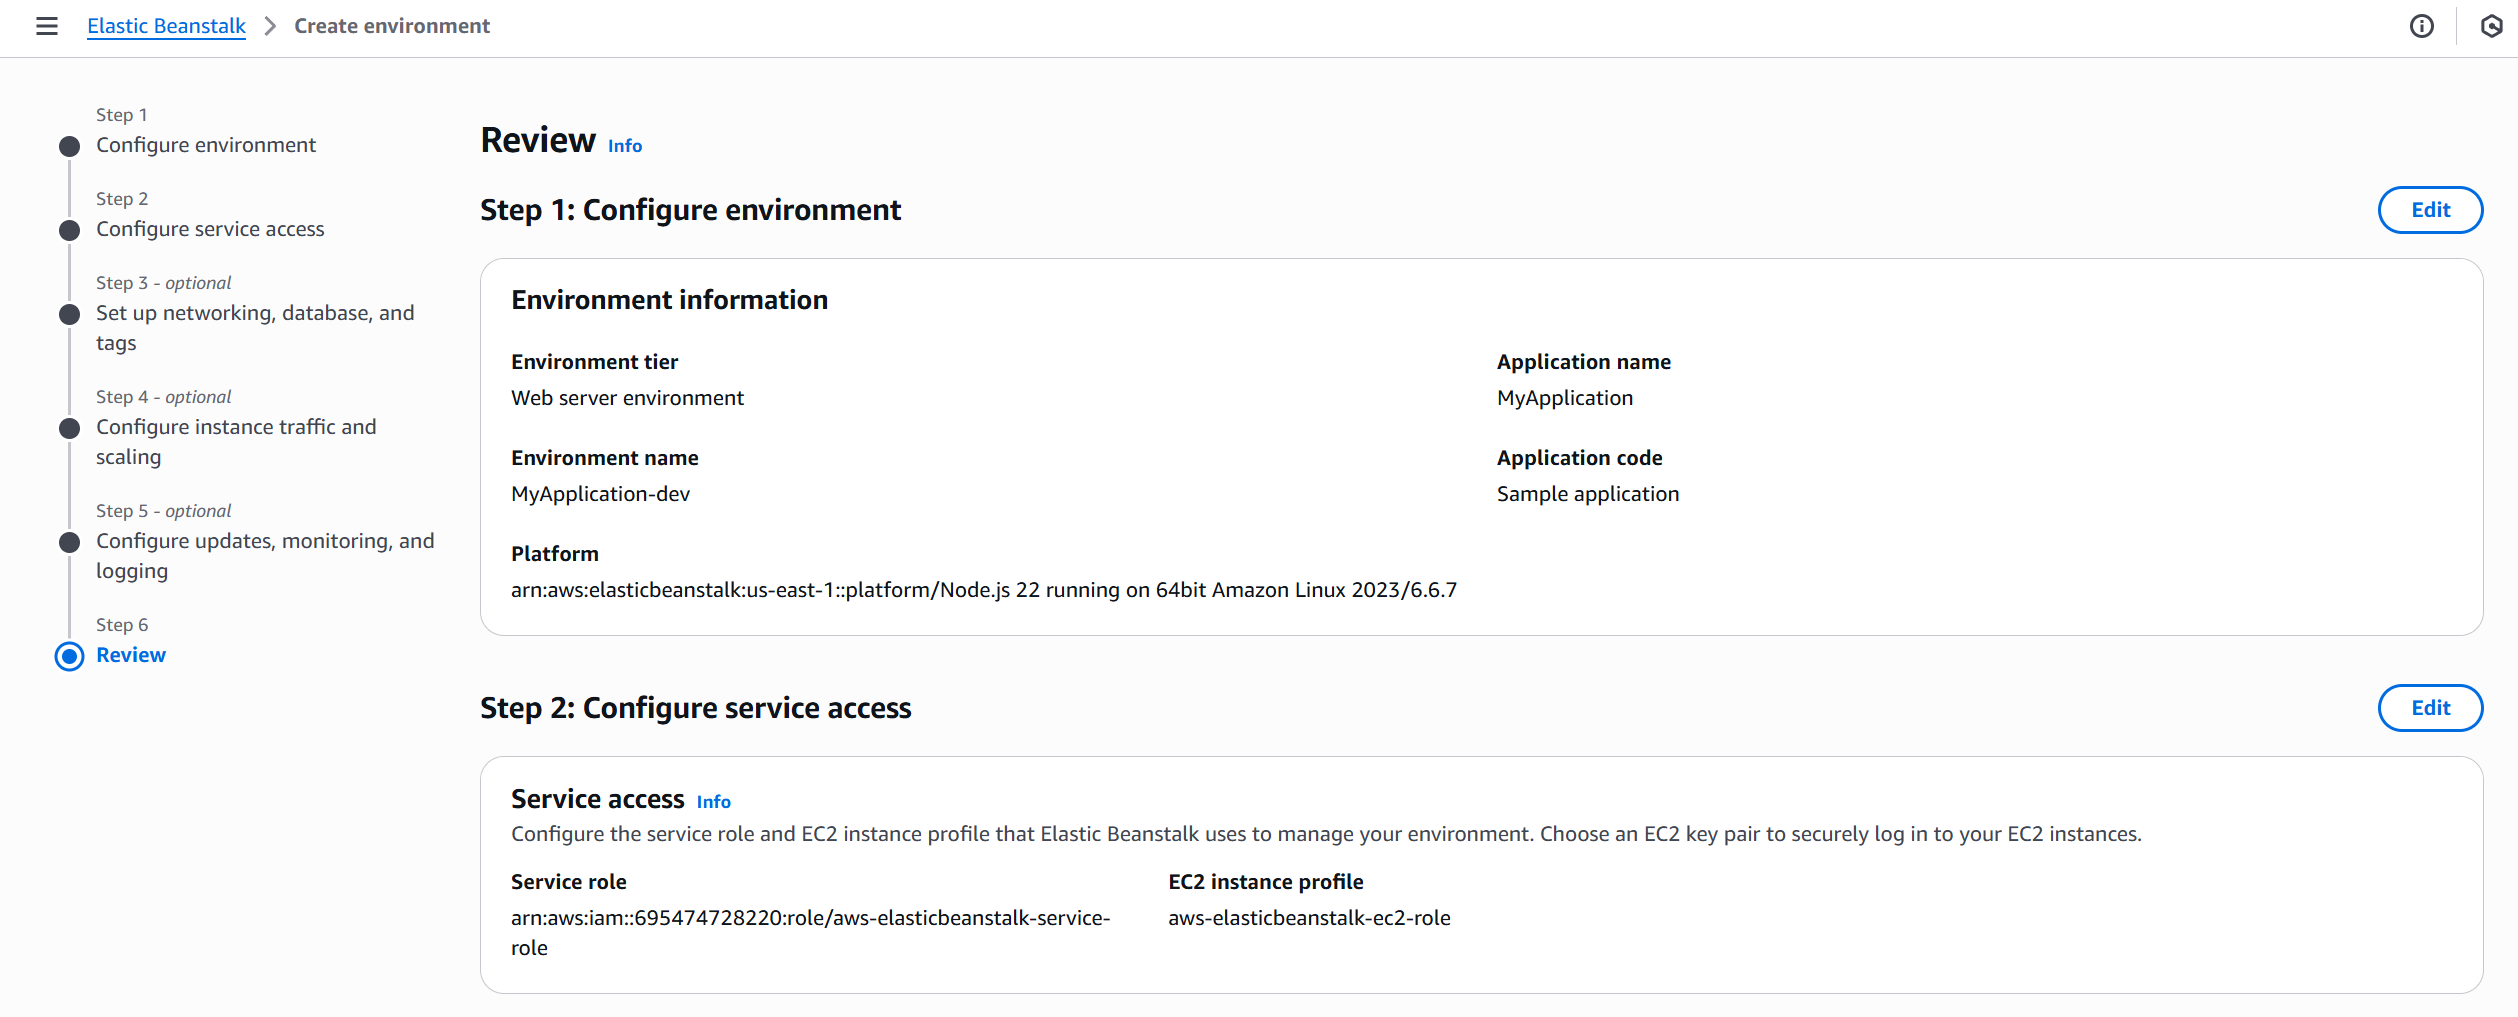
Step 9: Review and Create
- Click Next through optional screens (Networking, Database, etc.).
- Click Skip to review → verify all configurations.
- Ensure both roles (service + instance) are correctly assigned.
- Click Create environment.
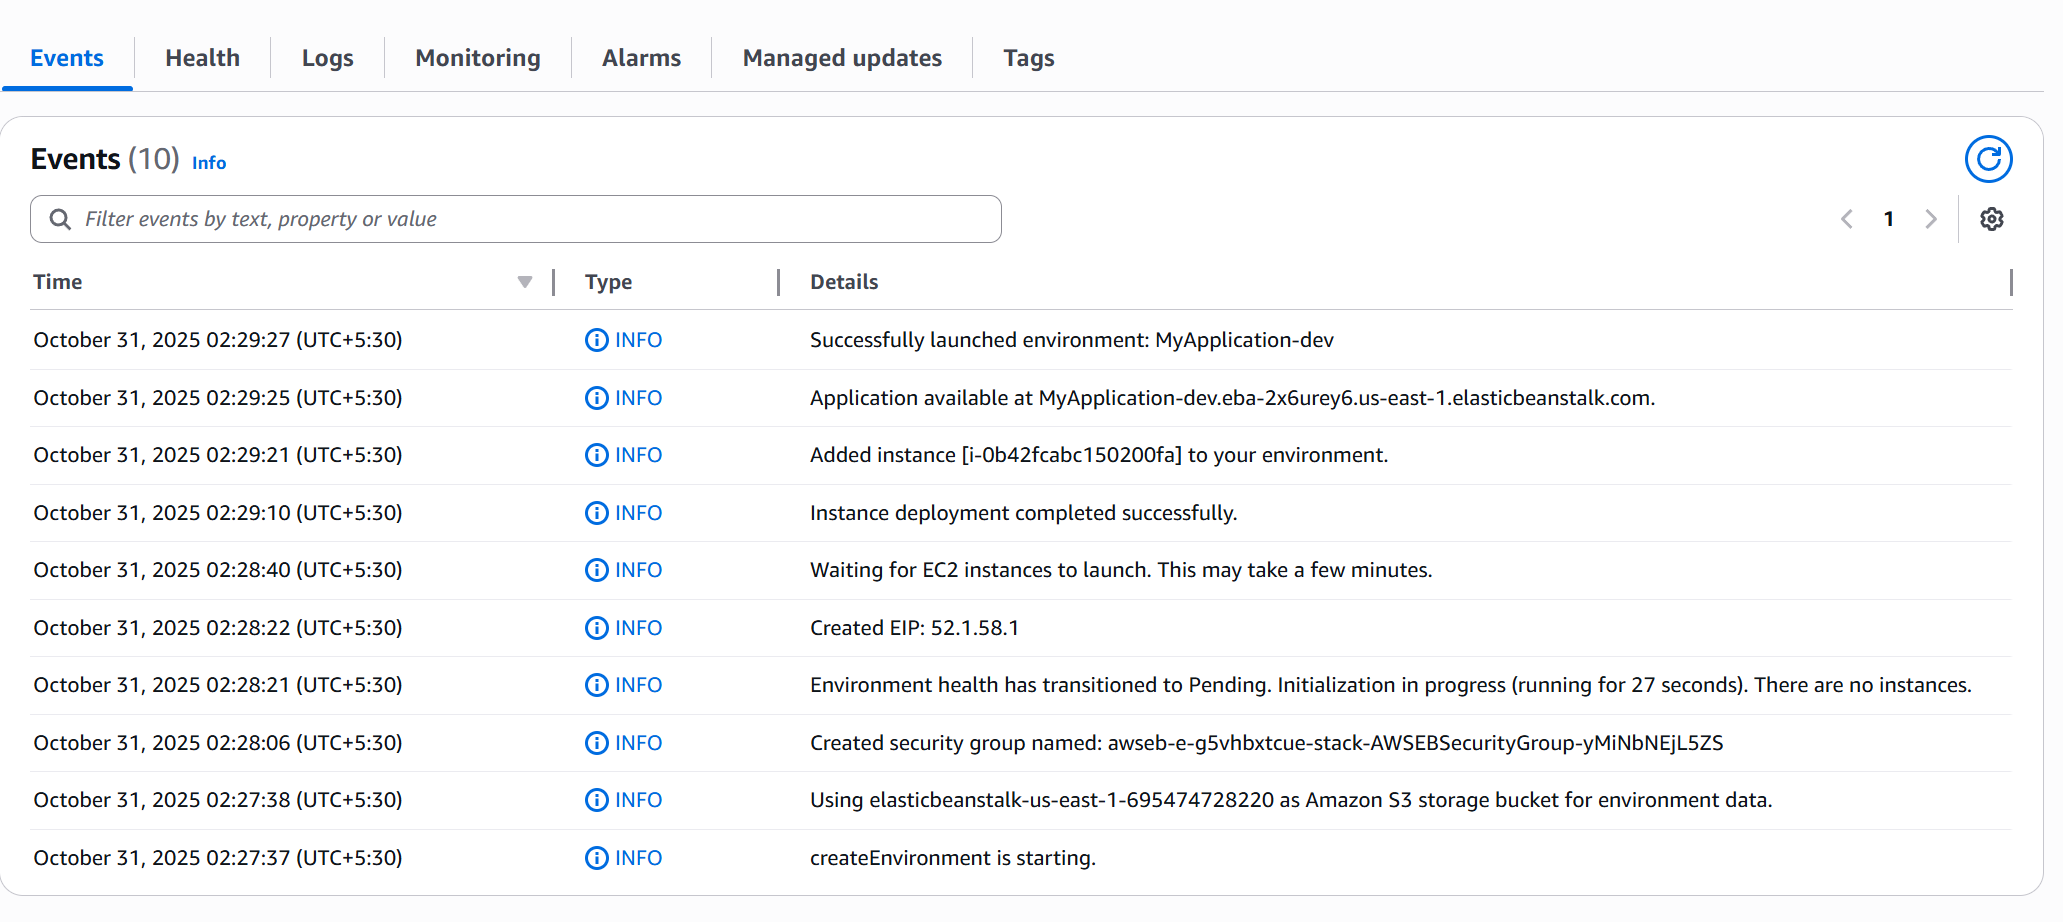
Step 10: Monitor Environment Creation
- Beanstalk triggers a CloudFormation stack.
- In Elastic Beanstalk → Events, watch for:
CREATING_IN_PROGRESS→CREATE_COMPLETE
- CloudFormation provisions:
- EC2 instance(s), Security Groups, Auto Scaling Group, Elastic IP, etc.
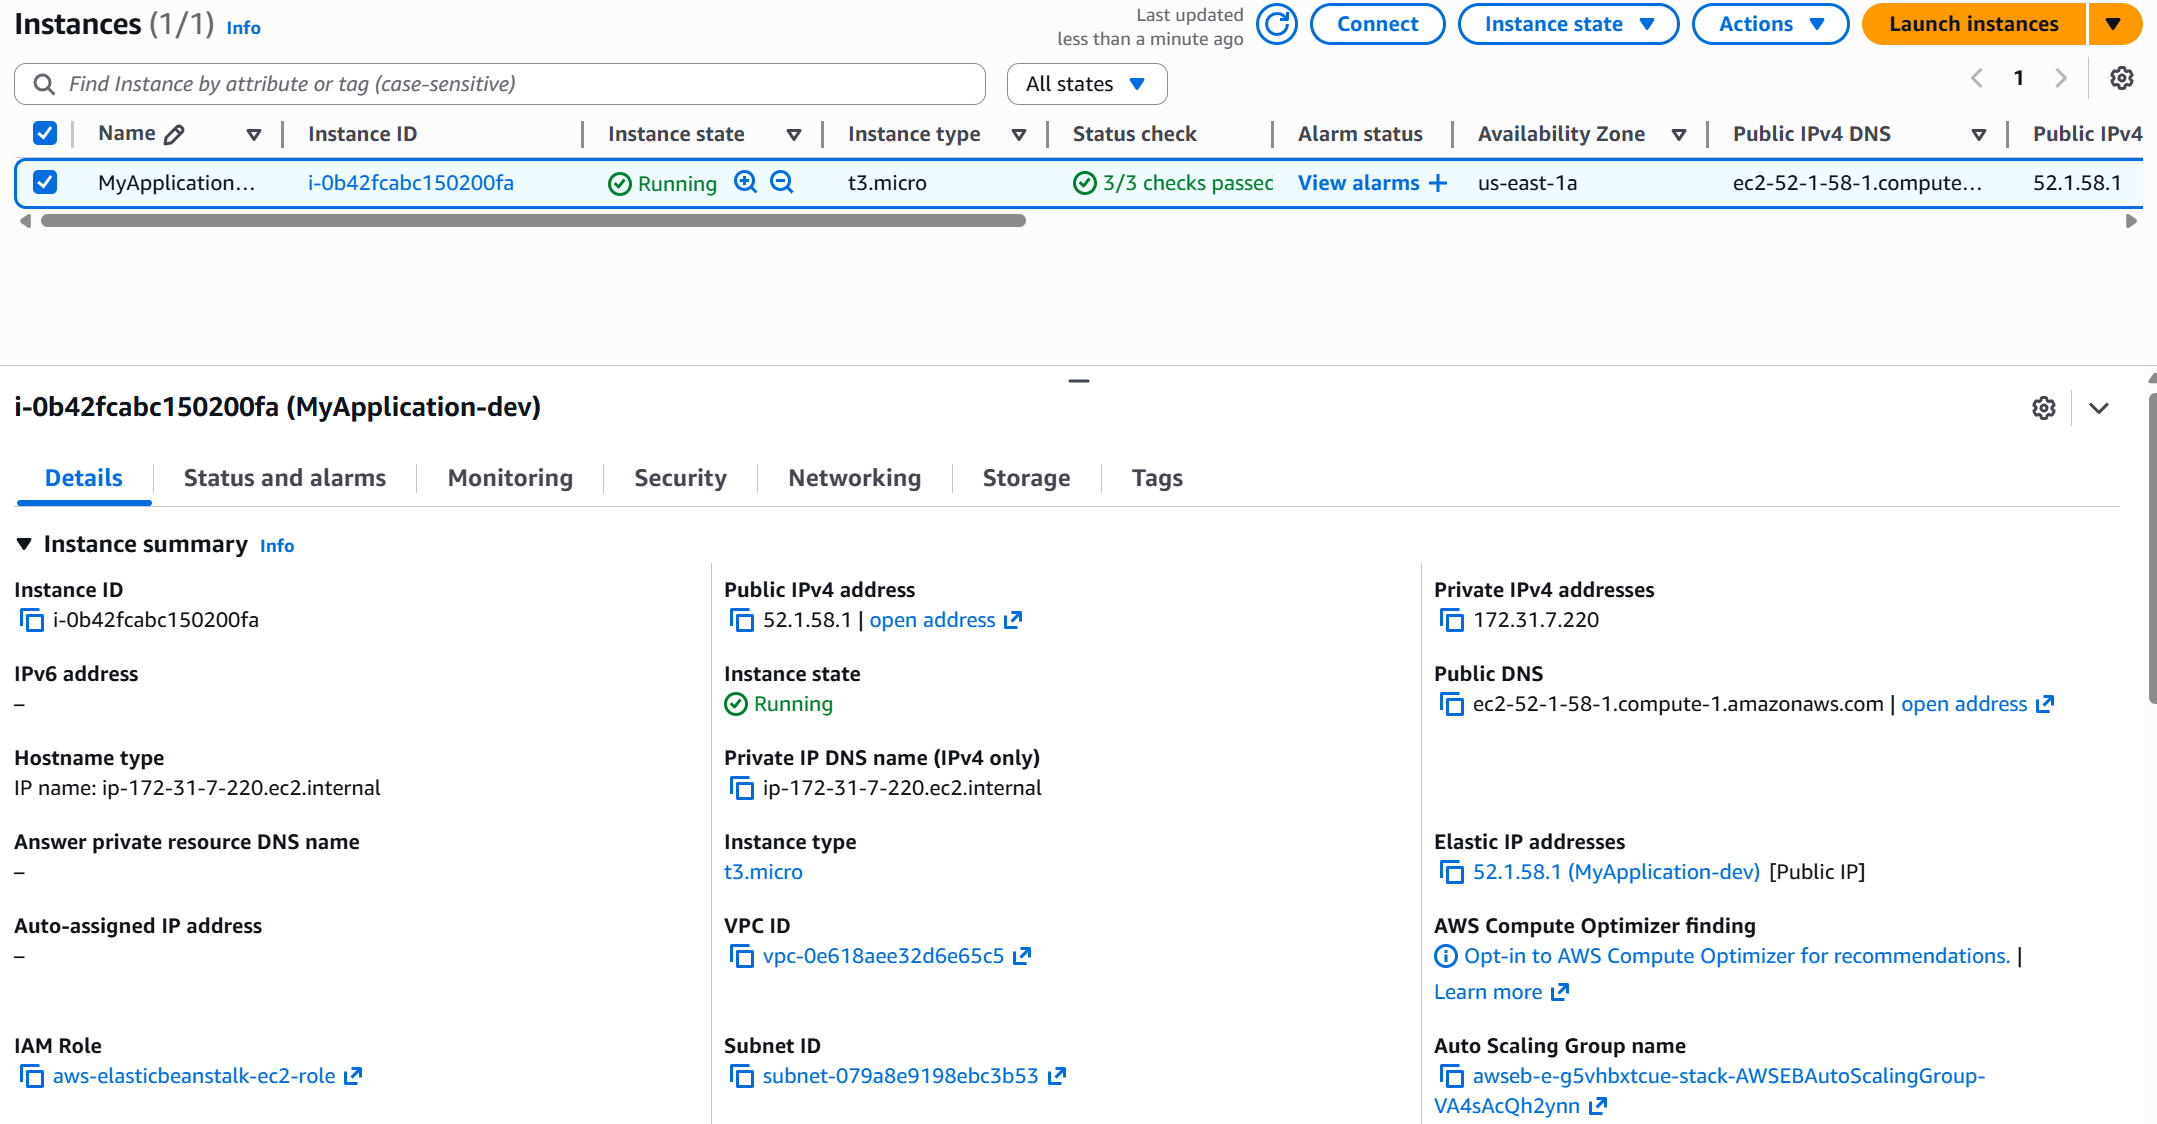
Step 11: Verify Underlying AWS Resources (Optional)
- EC2 Console: Check running instance (t2/t3.micro).
- Elastic IPs: Confirm if one is assigned.
- Auto Scaling: Single-instance group should appear.
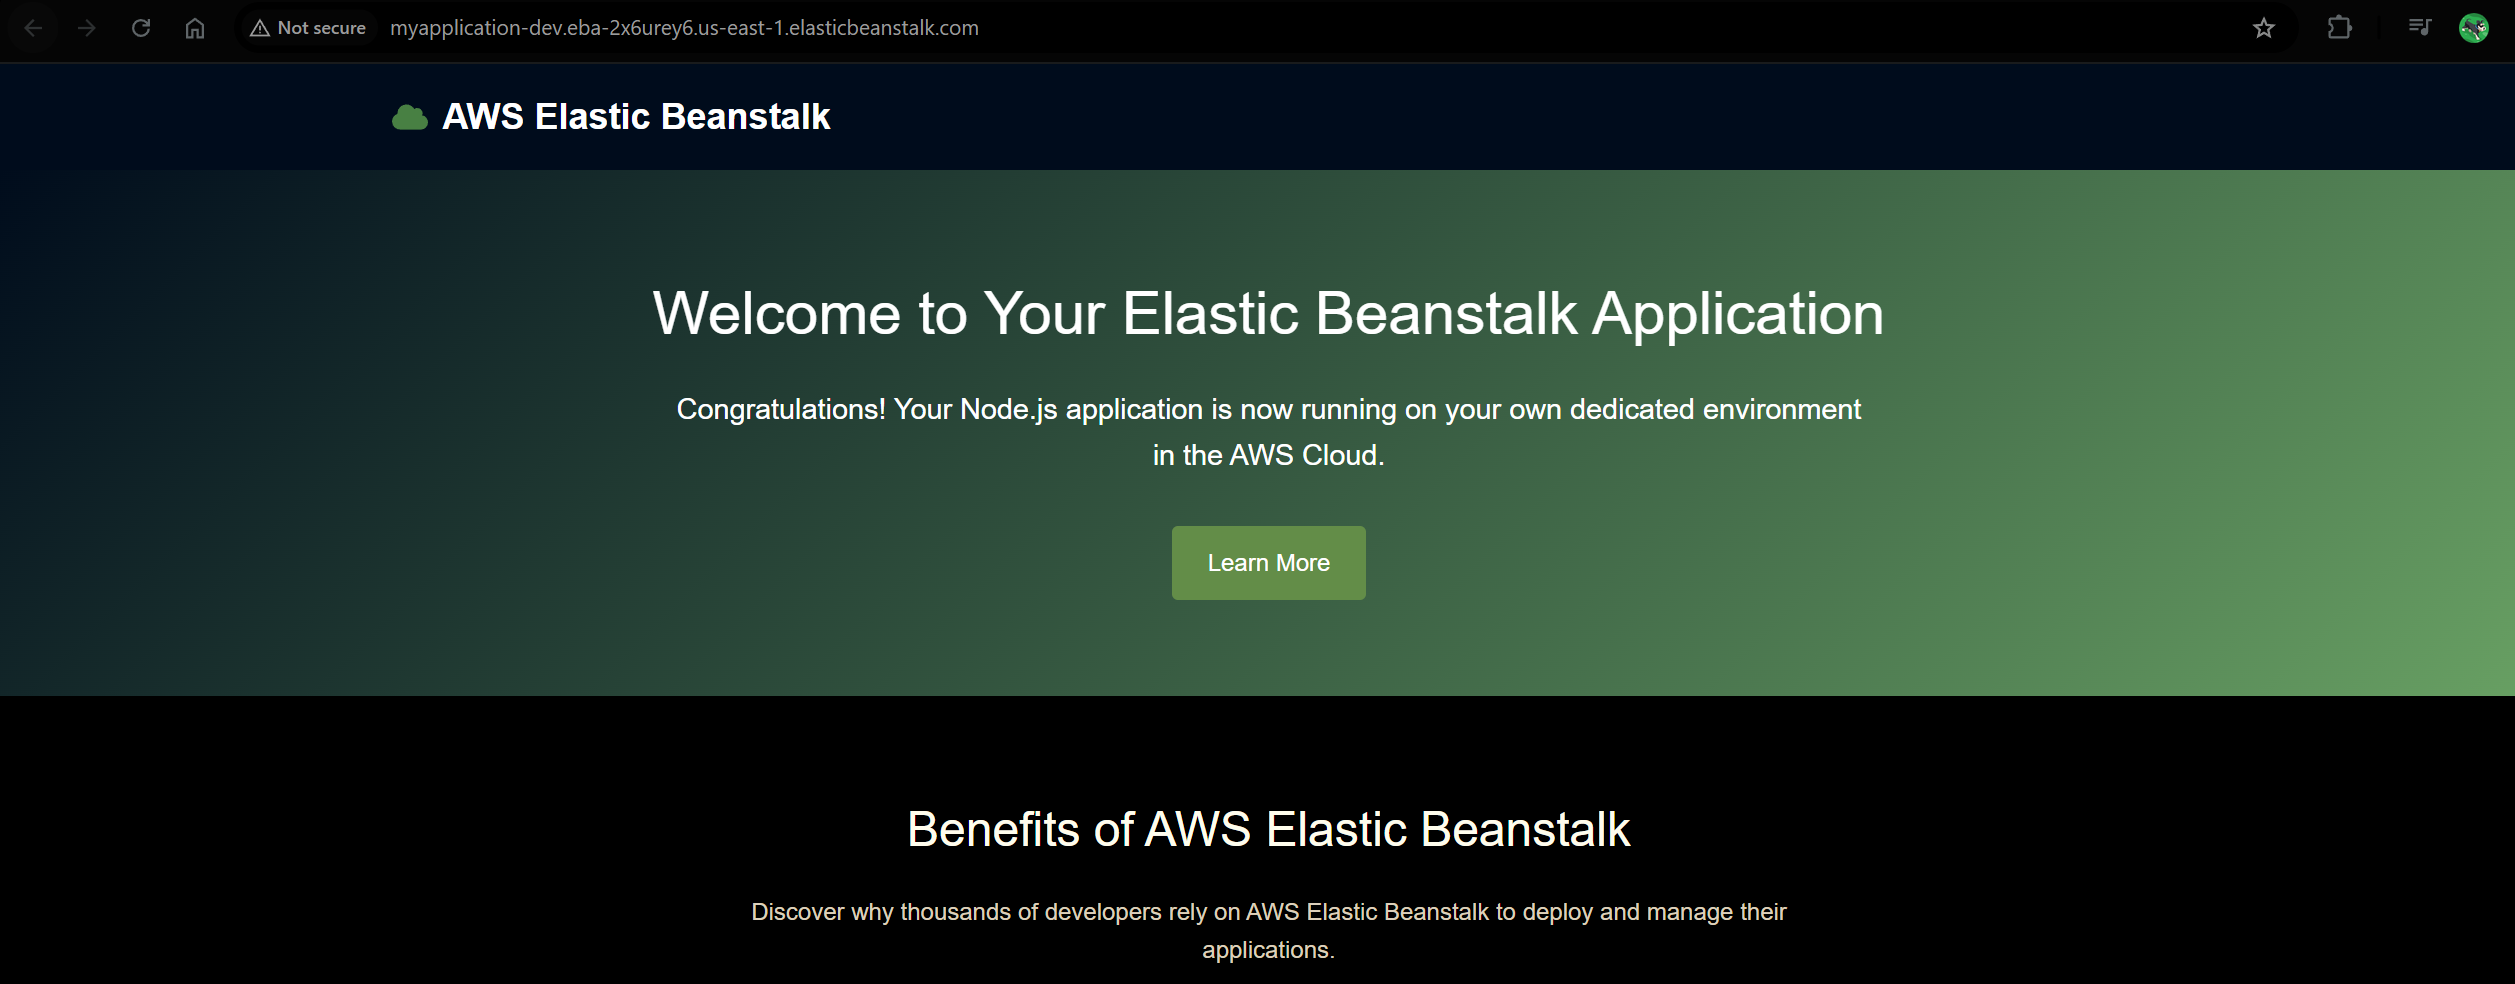
Step 12: Test the Application
- On the Beanstalk environment page, click the environment URL/domain.
- The sample app should load (“Congratulations, you are now running Elastic Beanstalk…”).
Step 13: Common Post-Setup Actions
| Action | How to Access |
|---|---|
| Upload & Deploy New Version | Actions → Upload and Deploy |
| View Logs | Logs tab |
| Monitor Performance | Monitoring tab |
| Configure Updates/Settings | Configuration tab |
Step 14: Create Multiple Environments (Optional)
- You can create environments like:
MyApplication-devMyApplication-prod
- Useful for separate staging/production setups.
Step 15: Cleanup Resources
To avoid charges:
- From the Application page, choose Actions → Delete application.
- Verify deletion of related:
- EC2 instances
- EIPs
- Load Balancers
- CloudFormation stacks
💡 Notes & Tips
- If IAM roles don’t autofill, create EC2 role manually first.
- Single instance setups are ideal for labs/free-tier.
- For production, prefer Multi-AZ / Load Balanced environments.
- Elastic Beanstalk uses CloudFormation under the hood.
- If creation fails, check Events tab for detailed error logs.
✅ You now have a Node.js web app running on AWS Elastic Beanstalk!
Use the Configuration, Monitoring, and Logs sections to manage your environment as you iterate.