🌐 03. Creating ELB (Elastic Load Balancer)
In this hands-on exercise, we will:
- Launch two EC2 instances.
- Deploy a simple web app using EC2 User Data.
- Create an Application Load Balancer (ALB) to distribute traffic between the two instances.
- Test load balancing and health checks.
🧭 Architecture Diagram
[ Client Browser ]
        |
        ▼
[ 🌐 AWS Application Load Balancer ]
        |
 ┌──────────────┐
 ▼                 ▼
[ EC2 #1 ]    [ EC2 #2 ]
Hello World   Hello World
⚙️ A. Launch EC2 Instances
🪜 Step 1: Go to the EC2 Console
- Navigate to EC2 → Instances → Launch Instances.
🪜 Step 2: Configure Instance Details
| Setting | Value |
|---|---|
| Name | My First Instance |
| Amazon Machine Image (AMI) | Amazon Linux 2 |
| Instance Type | t2.micro |
| Number of Instances | 1 |
| Key Pair | Proceed without a key pair |
💡 Tip: Launch each EC2 instance separately, so you can choose a different Availability Zone for each (for example, ap-south-1a and ap-south-1b).
🪜 Step 3: Configure Network Settings
-
Select existing security group →
launch-wizard-1 -
This group should already allow:
- HTTP (port 80)
- SSH (port 22)
🪜 Step 4: Add User Data (Web Server Script)
Scroll down to Advanced details → User Data and paste the following:
#!/bin/bash
yum update -y
yum install -y httpd
systemctl start httpd
systemctl enable httpd
echo "<h1>Hello World from $(hostname -f)</h1>" > /var/www/html/index.html
🪜 Step 5: Launch First Instance and Create AMI for Second
-
Click Launch Instances to launch the first instance.
-
Rename the launched instance to:
My First Instance
-
After the first instance is running and configured, create an AMI from it:
- Select the instance → Actions → Image and templates → Create image.
- Give the image a name (for example,
my-first-instance-ami) and create the image.
-
Launch the second instance using the newly created AMI:
-
Navigate to Launch Instances → choose My AMIs → select
my-first-instance-ami. -
Configure Instance Type (
t2.micro) and Network settings (choose the desired Availability Zone). -
Proceed without a key pair if desired.
-
Launch and rename the second instance to:
My Second Instance
-

🪜 Step 6: Verify
-
Wait for both instances to reach Running state.
-
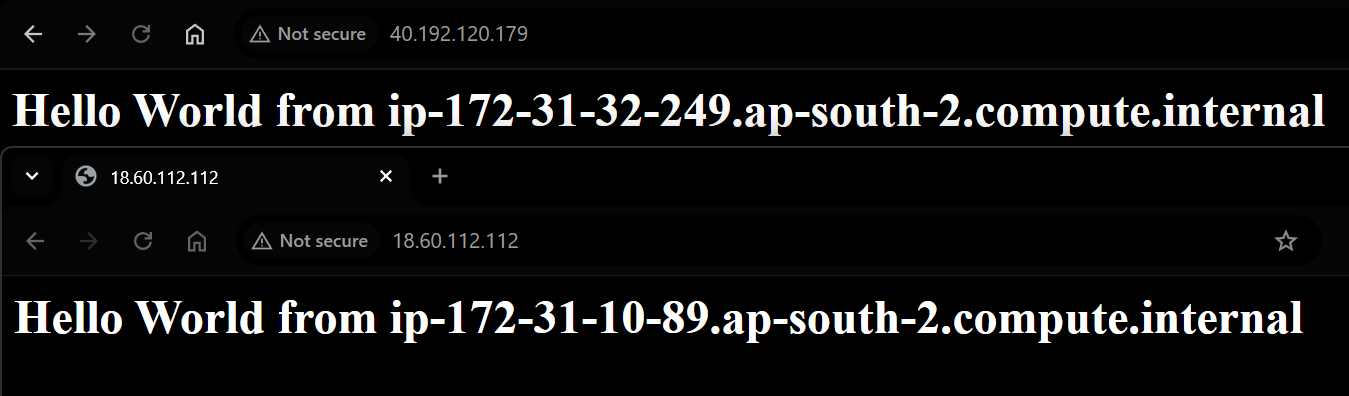
Copy each Public IPv4 address and open in a browser:
-
You should see:
Hello World from ip-...
-
⚖️ B. Create an Application Load Balancer (ALB)
🪜 Step 1: Navigate to Load Balancers
- Go to EC2 → Load Balancers → Create Load Balancer
🪜 Step 2: Select Type
Choose Application Load Balancer (ALB)
| Type | Protocol | Use Case |
|---|---|---|
| Application Load Balancer | HTTP/HTTPS | Web traffic |
| Network Load Balancer | TCP/UDP | Ultra-low latency |
| Gateway Load Balancer | All | Firewalls, inspection tools |
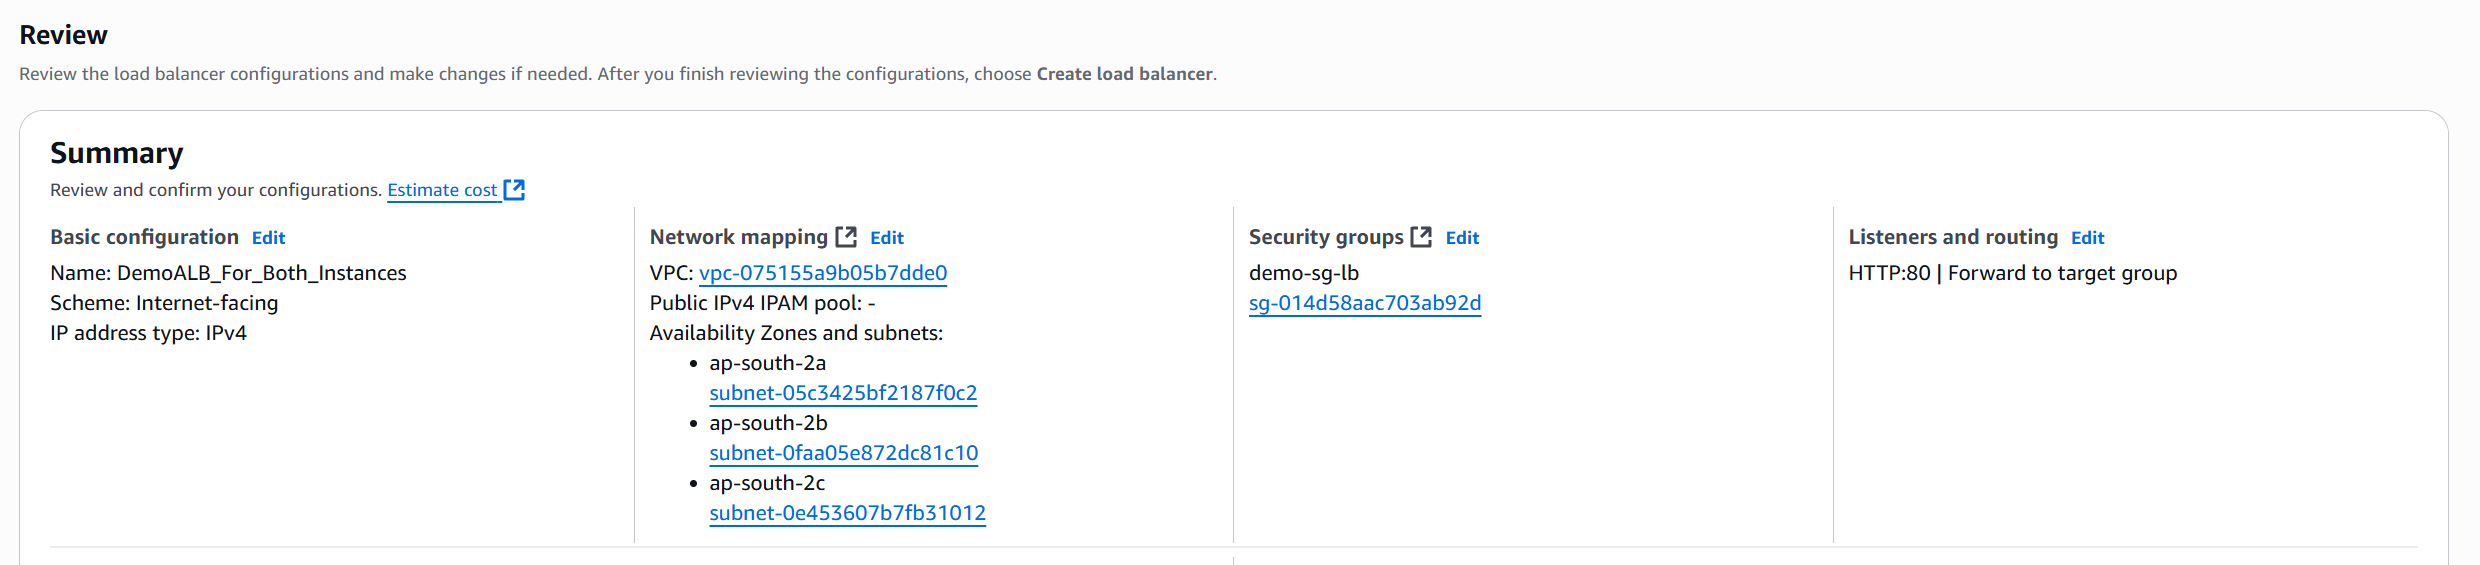
🪜 Step 3: Configure Basic Settings
| Field | Value |
|---|---|
| Name | DemoALB |
| Scheme | Internet-facing |
| Address Type | IPv4 |
🪜 Step 4: Network Mapping
- Choose your VPC.
- Select All Availability Zones.
🪜 Step 5: Configure Security Group
- Create a new SG named
demo-sg-load-balancer. - Allow HTTP (port 80) from anywhere (
0.0.0.0/0). - Attach this SG to the ALB (remove the default one).
🎯 Create Target Group
A Target Group is basically a collection of resources (targets) that your Load Balancer sends traffic to.
These “targets” are usually:
EC2 Instances ,Containers, IP Addresses, Lambda functions
Each target group tells AWS:
“Here’s where to send incoming requests that match certain rules.”
🪜 Step 1: Create Target Group
- Type: Instances
- Name:
demo-tg-alb - Protocol:
HTTP - Port:
80 - Health Check Path:
/
🪜 Step 2: Register Targets
- Select both EC2 instances.
- Click Include as pending below.
- Click Create Target Group.

🚀 Attach Target Group to Load Balancer
-
Go back to your ALB creation page.
-
Under Listeners and Routing, choose:
- Listener: HTTP on port 80
- Target Group:
demo-tg-alb
-
Click Create Load Balancer.

🔍 Test Load Balancing
🪜 Step 1: Wait for Provisioning
- Wait until ALB status = Active.
- Copy the DNS name (e.g.,
demoalb-123456.elb.amazonaws.com).
🪜 Step 2: Access the Load Balancer
-
Open the DNS name in a browser.
-
Refresh the page multiple times:
- You’ll see the instance name changes.
- ✅ Confirms load balancing is working.
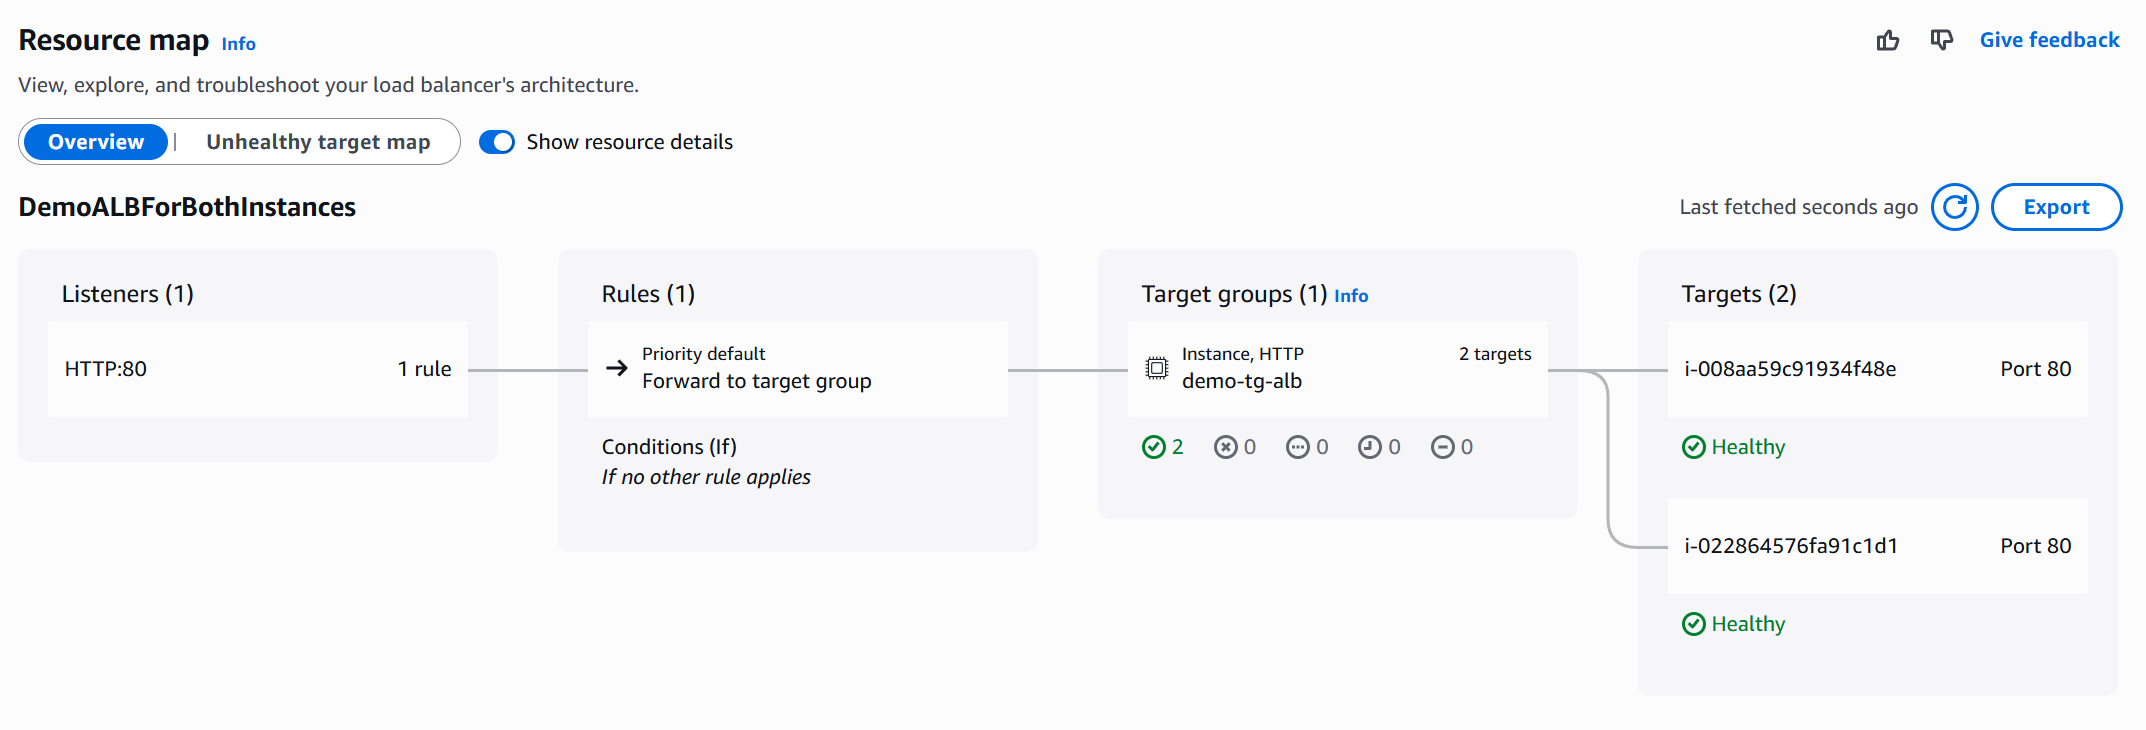
💚 Health Check and Fault Tolerance
🪜 Step 1: Check Target Health
- Go to Target Groups → demo-tg-alb → Targets.
- Both should show as Healthy.
🪜 Step 2: Simulate Failure
-
Stop one instance.
-
Refresh target group → it becomes Unhealthy/Unused.
-
Refresh browser:
- Traffic routes only to the healthy instance.
🪜 Step 3: Recovery
-
Start the stopped instance.
-
It will move from Initial → Healthy status.
-
Refresh browser:
- Requests will again alternate between both instances.
✅ Summary
| Component | Purpose |
|---|---|
| EC2 Instances | Host simple “Hello World” web app |
| Application Load Balancer | Distributes HTTP traffic |
| Target Group | Tracks instance health |
| Security Groups | Control inbound traffic |
| Health Checks | Detect unhealthy instances |
⚙️ Limitation
In this step, we are manually launching EC2 instances to understand how web servers are created and managed before automating the process later with Auto Scaling Groups (ASG).
🧭 What We’re Doing
We’re:
- Manually launching two EC2 instances
- Installing Apache (httpd) using User Data
- Placing both behind a Load Balancer
This builds the base understanding of how individual servers are configured and connected.
⚡ Why Manual Launch Isn’t Ideal
| Limitation | Explanation |
|---|---|
| ❌ Manual scaling | You must add/remove instances by hand |
| ❌ No fault recovery | If one instance fails, it won’t auto-restart |
| ❌ Inefficient for traffic spikes | Load changes aren’t automatically handled |
🚀 Real-World Approach
In production, we use Auto Scaling Groups (ASG) with a Load Balancer to:
- Automatically launch instances across multiple AZs
- Replace unhealthy instances
- Scale up/down with traffic demand
🧩 Big Picture
We’re doing it manually now to understand the building blocks.
Later, ASG + Load Balancer will automate everything we just did.