05. Create an ASG
In this project, we will:
- Create an Application Load Balancer (ALB) and a Target Group.
- Create a Launch Template to define EC2 instance settings.
- Create an Auto Scaling Group (ASG) that automatically manages EC2 instances behind the ALB.
- Test automatic scaling and self-healing behavior.
🌐 01. Create a Target Group
- Navigate to EC2 Console → Target Groups → Create Target Group.
- Target type:
Instances - Name:
demo-tg-alb - Protocol:
HTTP - Port:
80 - VPC: Select your default VPC.
- Click Next.
- Skip registering targets for now.
- Click Create target group.

🌍 02. Create an Application Load Balancer (ALB)
- Navigate to EC2 Console → Load Balancers → Create Load Balancer.
- Choose Application Load Balancer.
- Name:
demo-alb - Scheme:
Internet-facing - IP address type:
IPv4 - Listeners: Protocol
HTTP, Port80 - VPC: Select your default VPC.
- Availability Zones: Select at least two subnets.
- Under Security Groups, select or create one that allows HTTP (port 80).
- Target Groups: Select existing target group
demo-tg-alb. - Click Create Load Balancer.

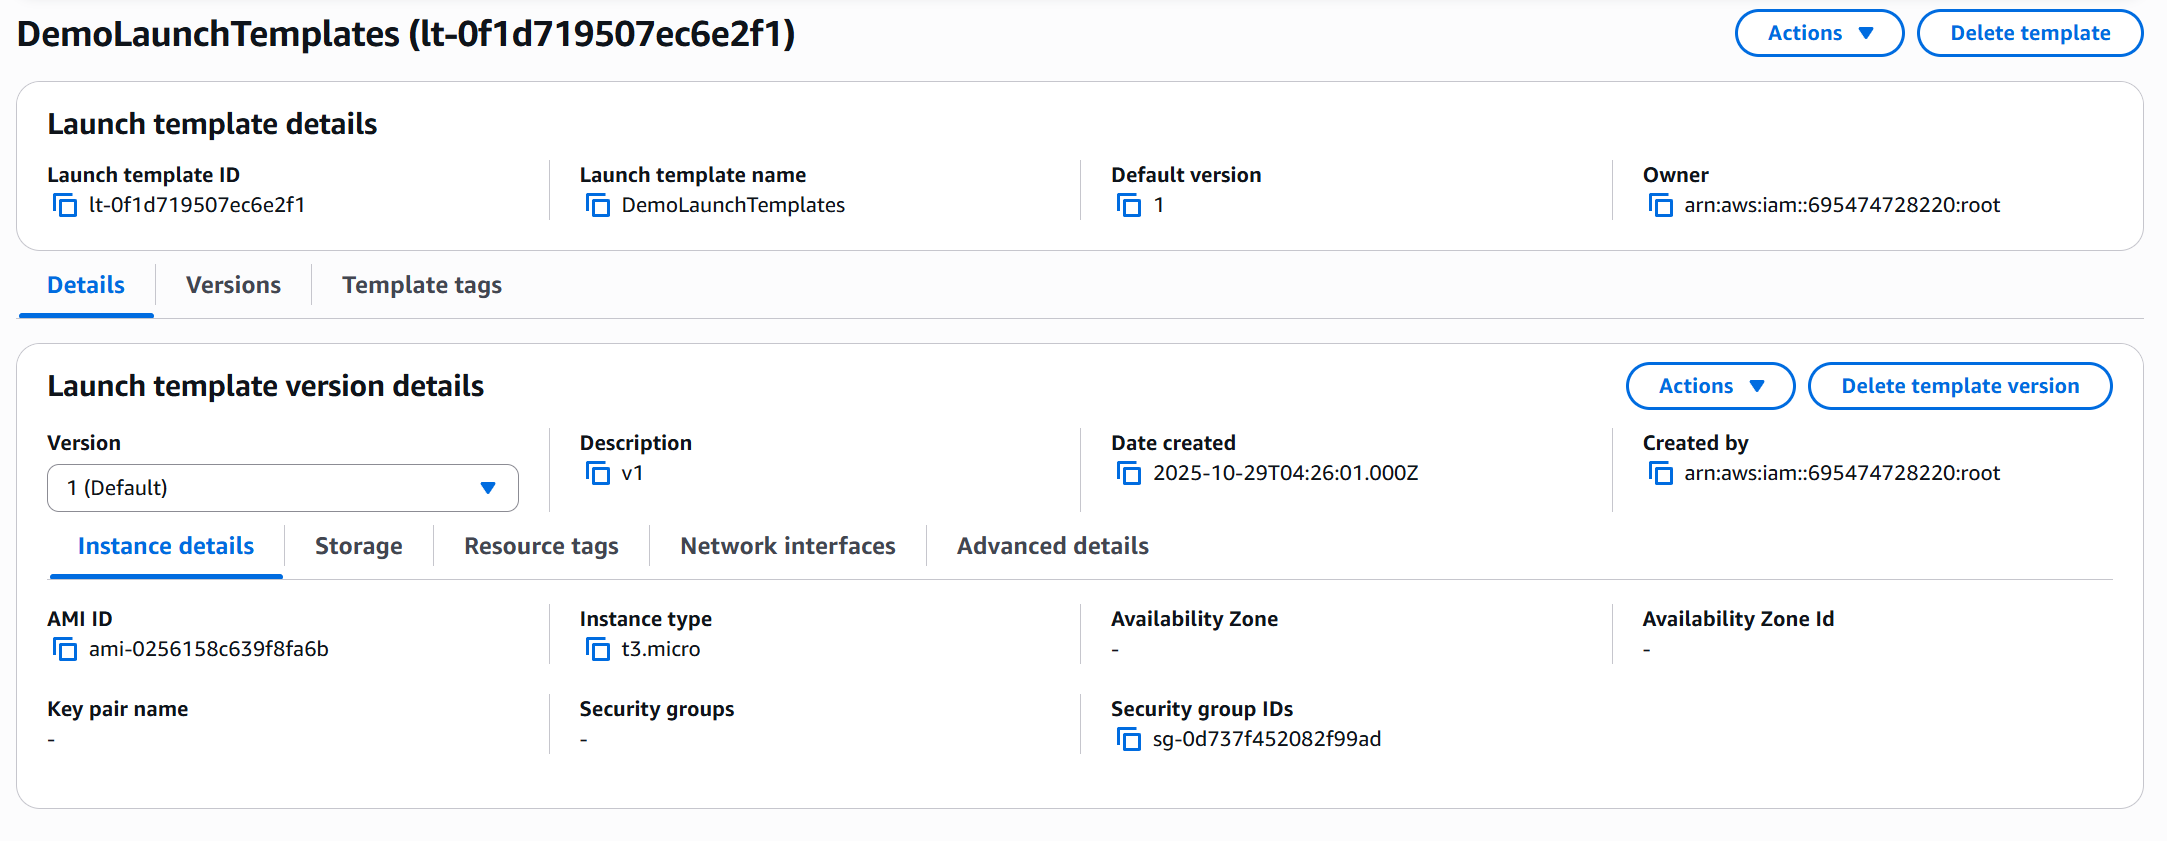
🚀 03. Create a Launch Template
- Navigate to Launch Templates → Create launch template.
- Enter:
- Name:
DemoLaunchTemplates - Version description:
v1
- Name:
- Under Amazon Machine Image (AMI):
- Choose Amazon Linux 2.
- Under Instance type:
- Select t3.micro.
- Key pair: Select No key pair.
- Network settings:
- Skip subnets.
- Choose existing Security Group:
asg-sg(allows HTTP).
- Scroll to Advanced details → User data:
- Paste this sample user data script:
#!/bin/bash
yum update -y
yum install -y httpd
systemctl start httpd
systemctl enable httpd
echo "<h1>Hello World from $(hostname -f)</h1>" > /var/www/html/index.html
- Paste this sample user data script:
- Click Create launch template.
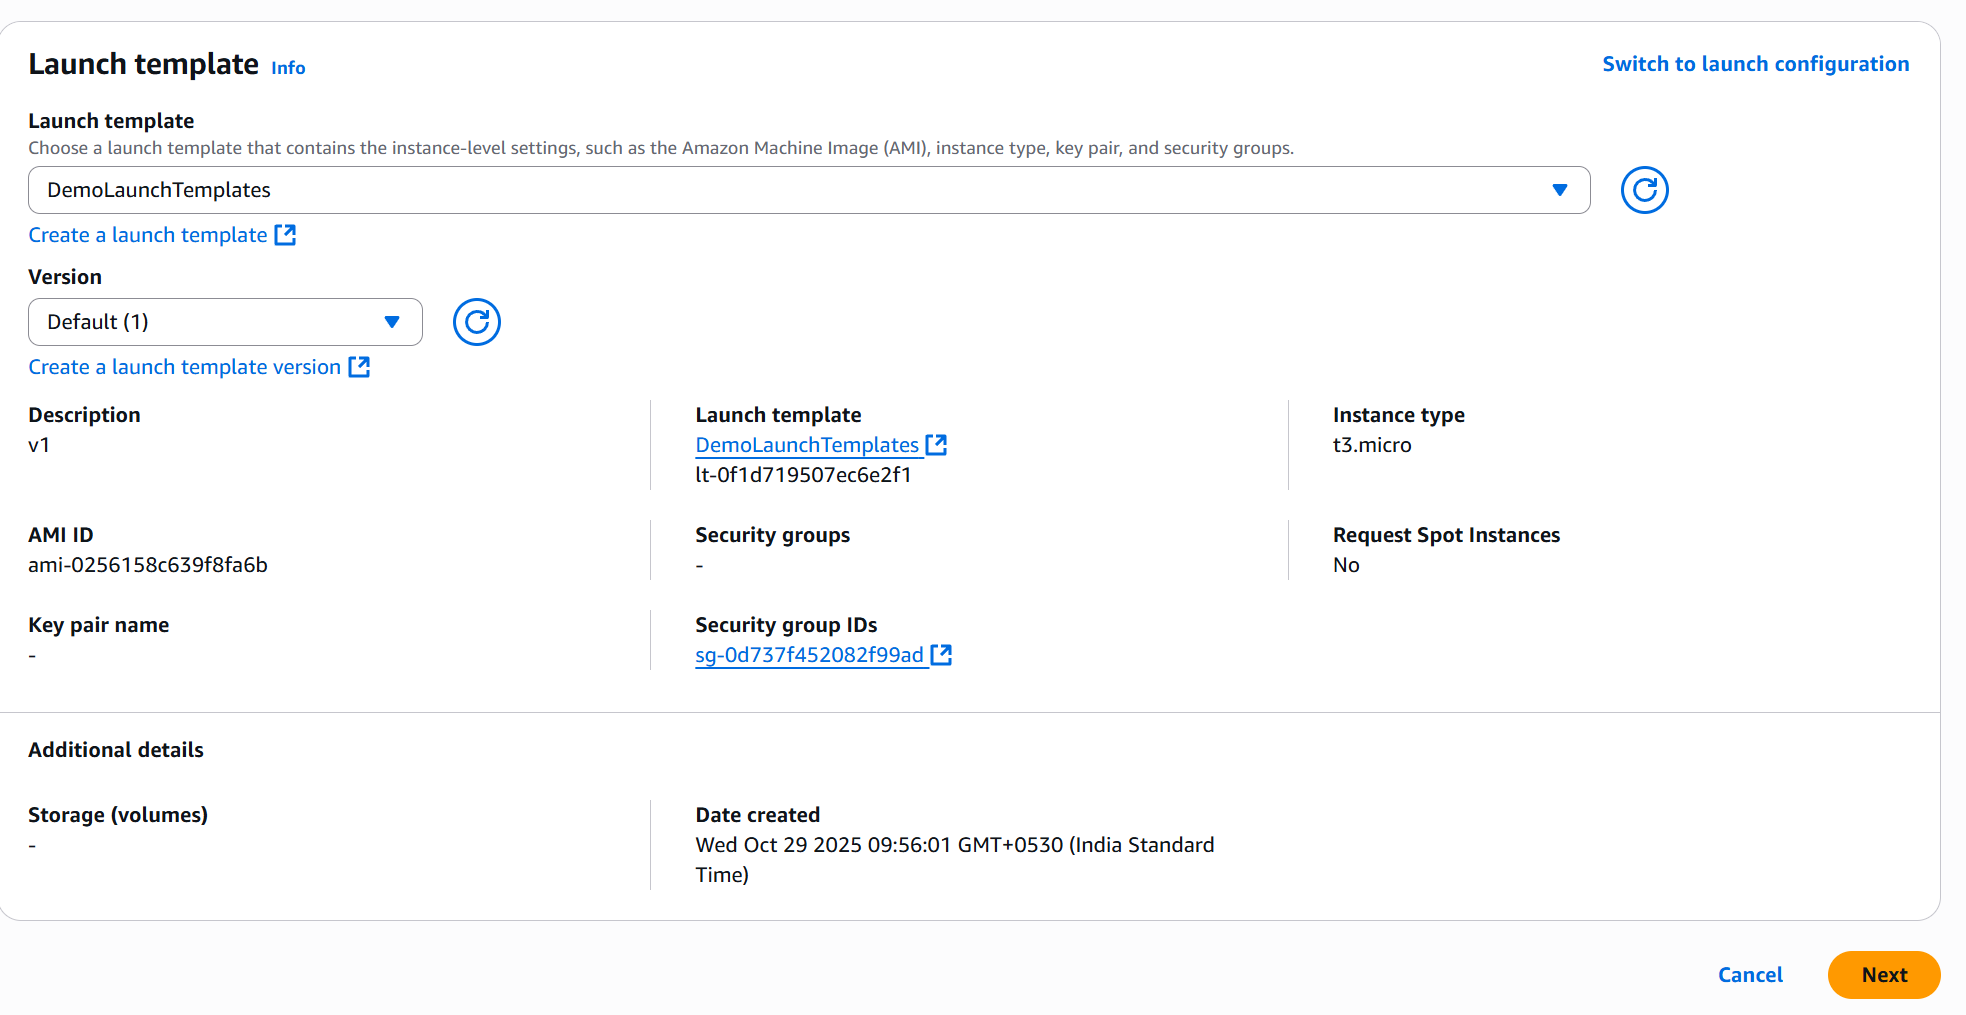
🧱 04. Create an Auto Scaling Group (ASG)
- Navigate to Auto Scaling Groups → Create Auto Scaling Group.
- Name:
DemoASG - Launch Template: Select
DemoLaunchTemplate. - Click Next.
🌐 05. Configure Network
- VPC: Select your existing VPC.
- Subnets: Choose at least two Availability Zones.
- Leave AZ Distribution:
Balanced best effort. - Click Next.
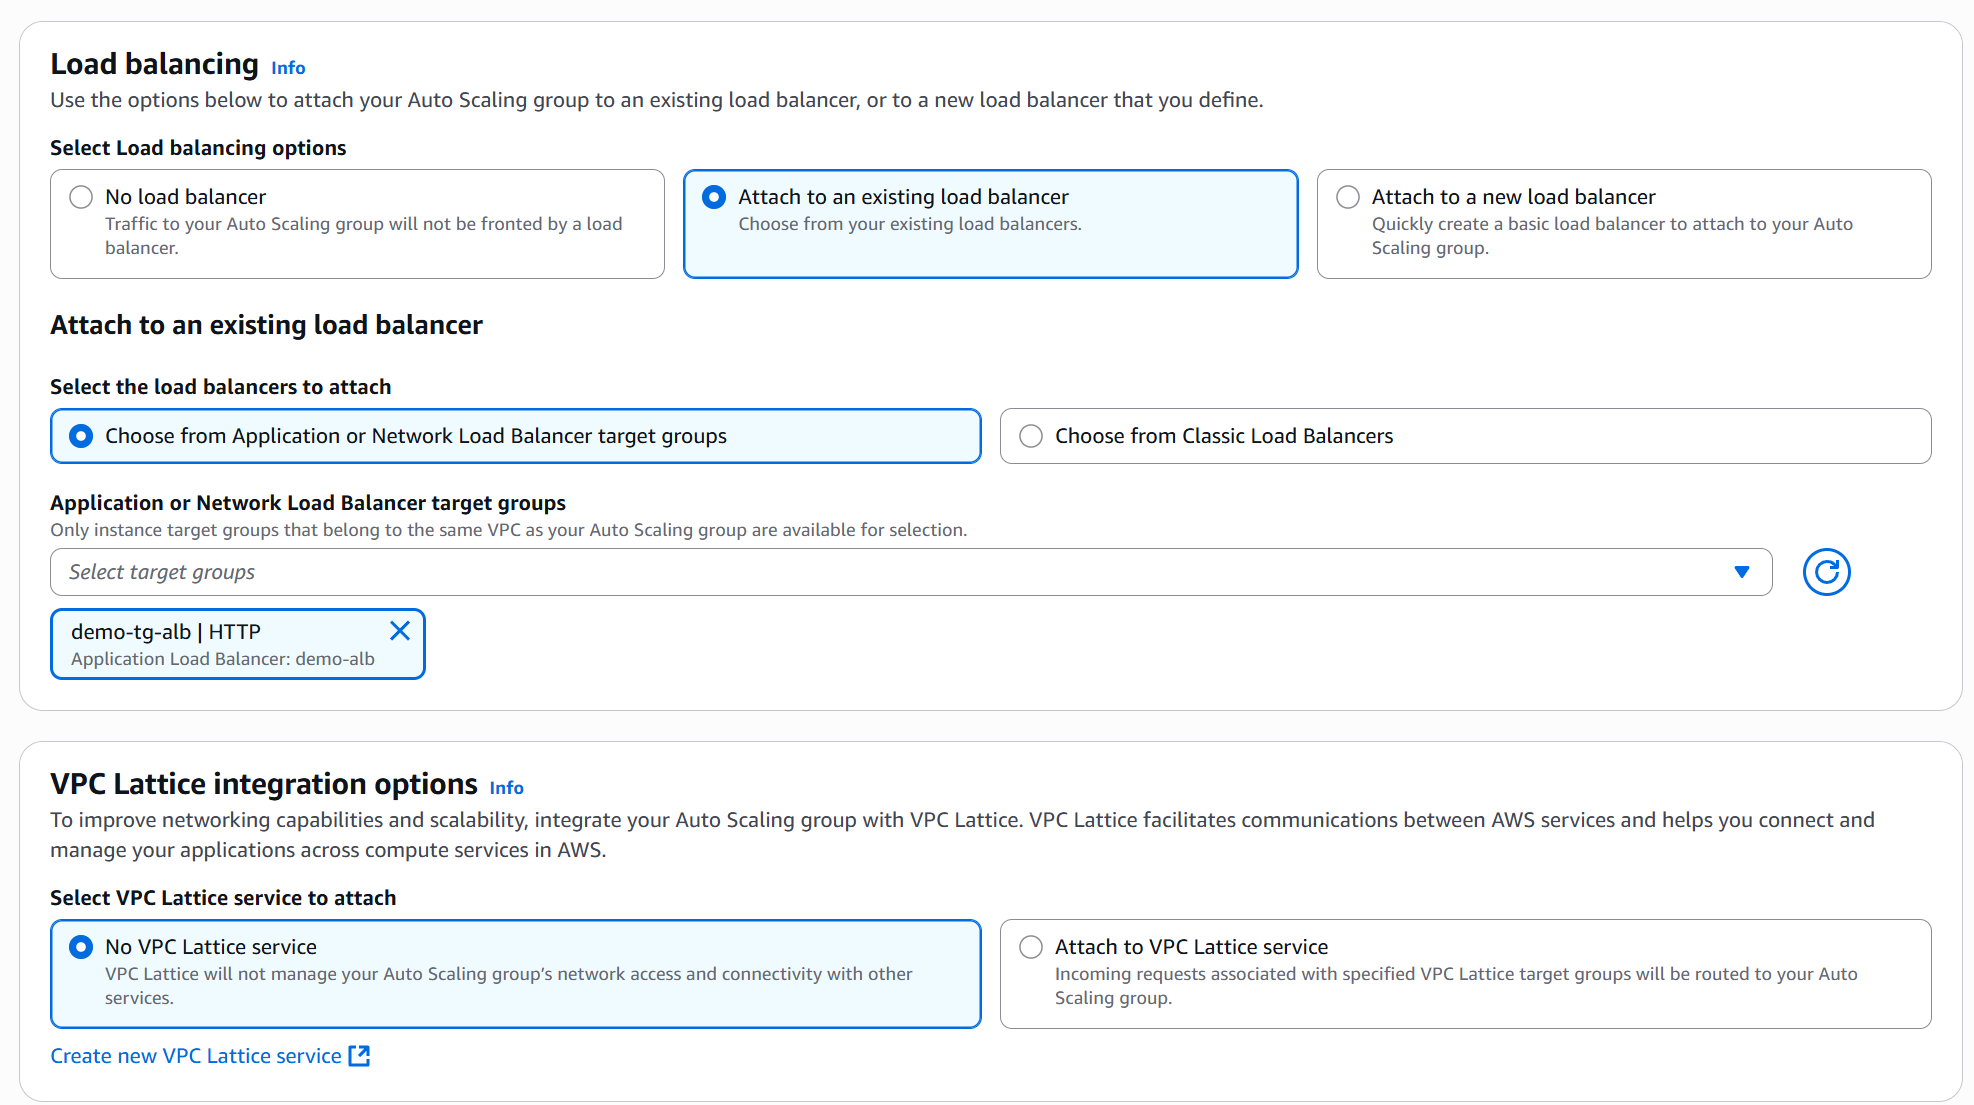
⚖️ 06. Attach Load Balancer
- Under Load balancing options:
- Choose Attach to an existing load balancer.
- Select Target Group:
demo-tg-alb.
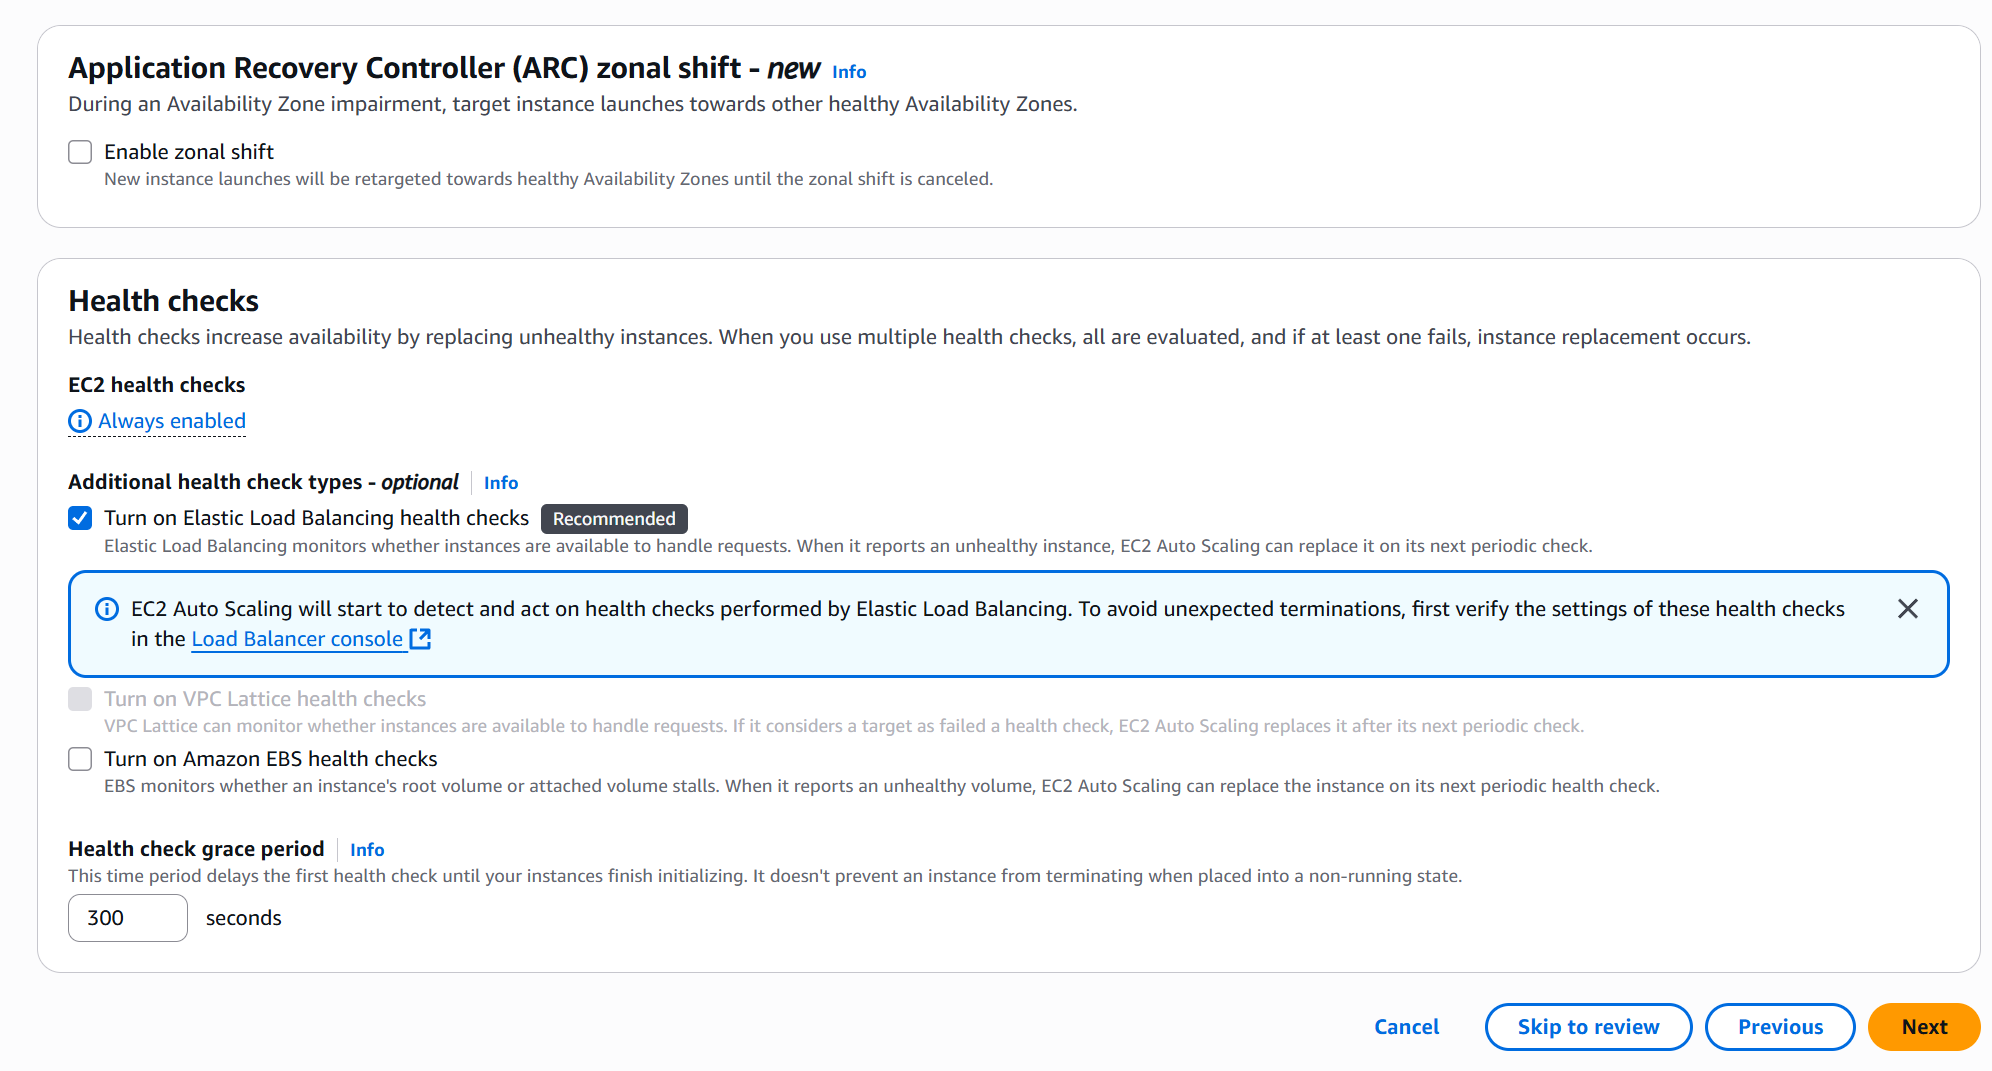
- Enable ELB Health Checks.
- Click Next.
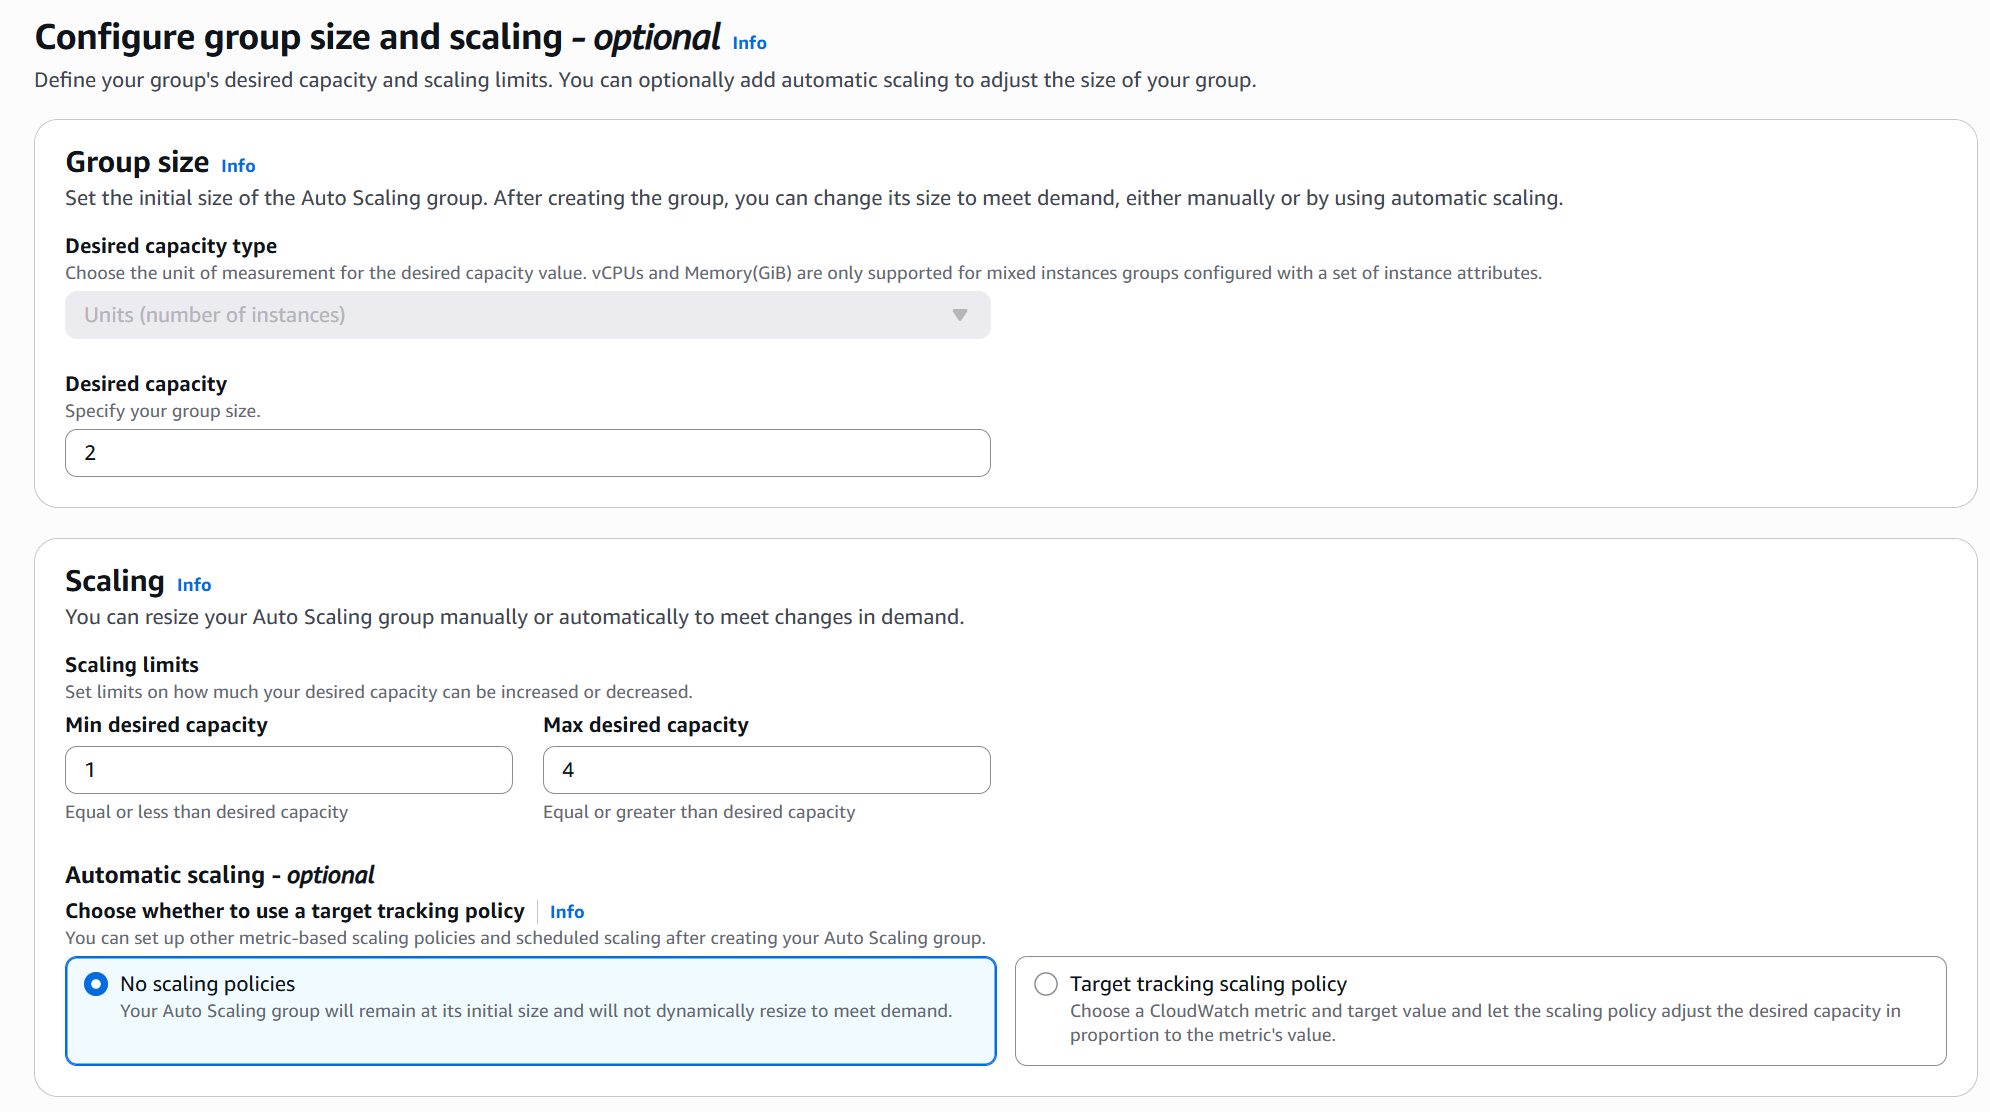
📊 07. Configure Group Size
- Desired capacity:
2 - Minimum capacity:
1 - Maximum capacity:
4 - Leave Automatic scaling policies disabled.
- Instance maintenance policy:
No policy - Skip:
- Additional capacity settings
- Notifications
- Tags
- Click Next → Create Auto Scaling Group.
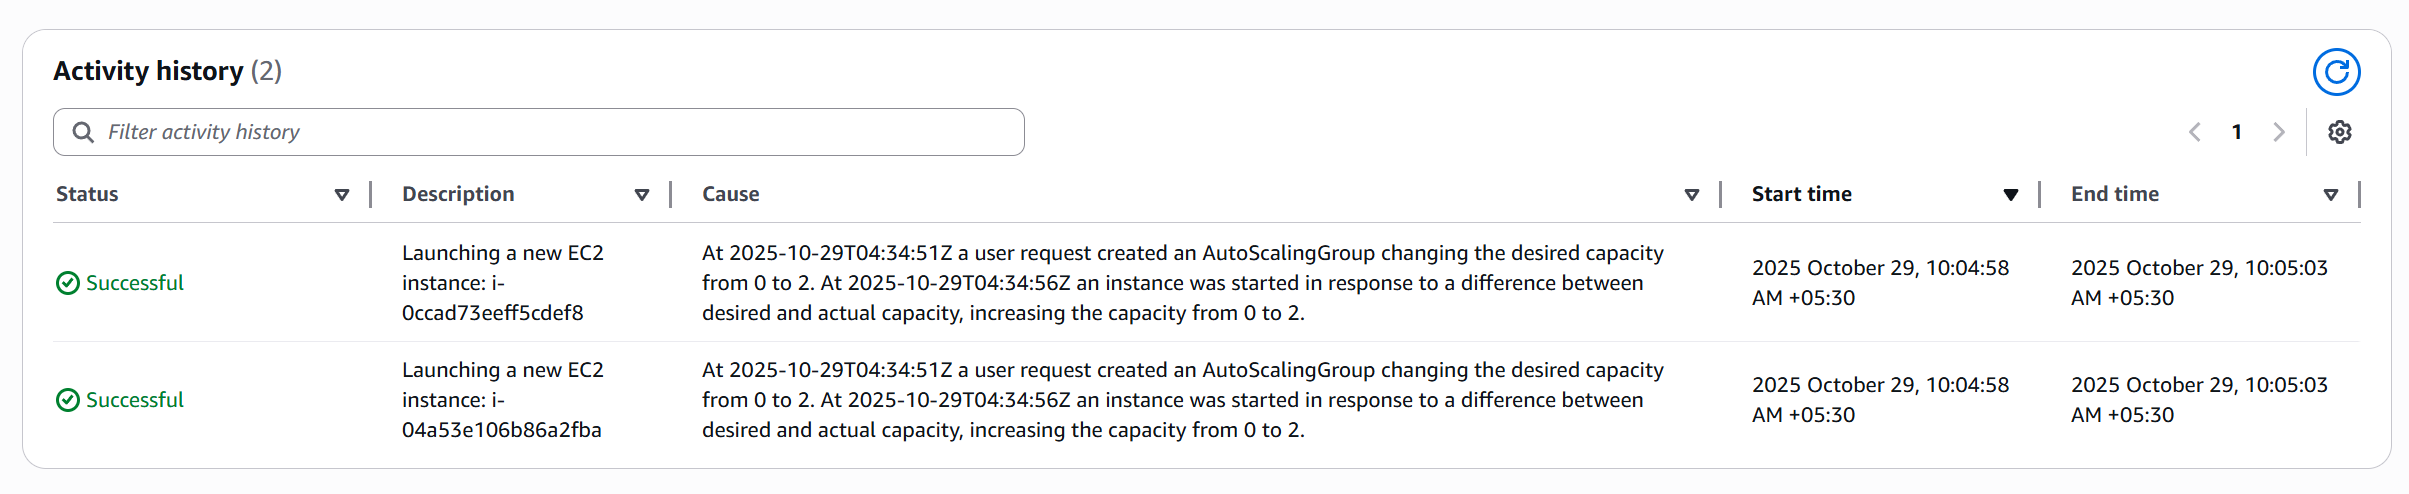
🔄 08. Verify Instance Creation
- Go to ASG → Activity tab.
- Observe creation of two EC2 instances.
- Go to Instance Management tab:
- Instances transition from Pending → InService.

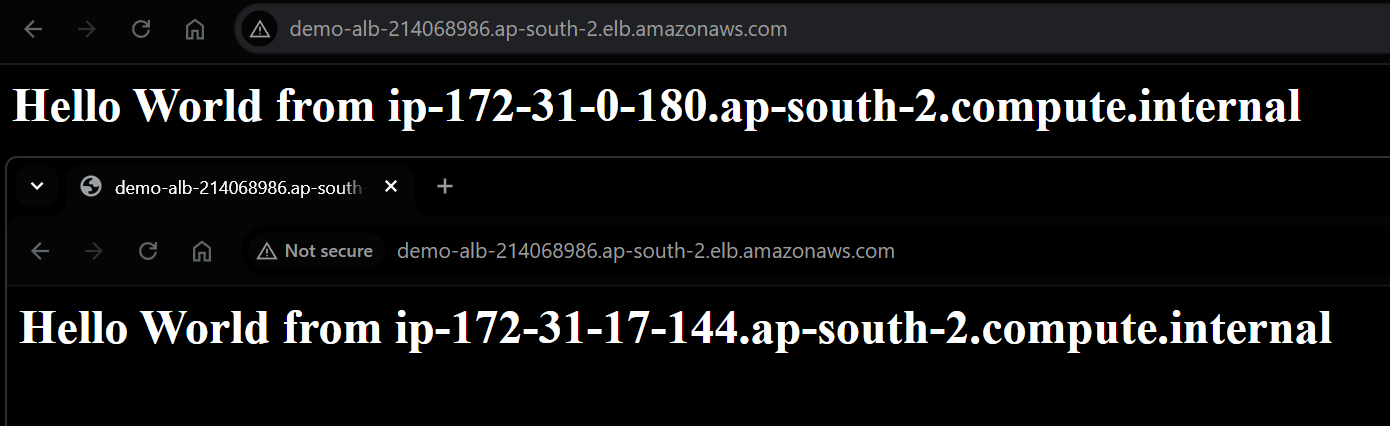
🌍 09. Test Load Balancer
- Go to Load Balancers → demo-alb.
- Copy the DNS name.
- Open it in a browser.
- You’ll see: Hello World from ip-xx-xx-xx-xx
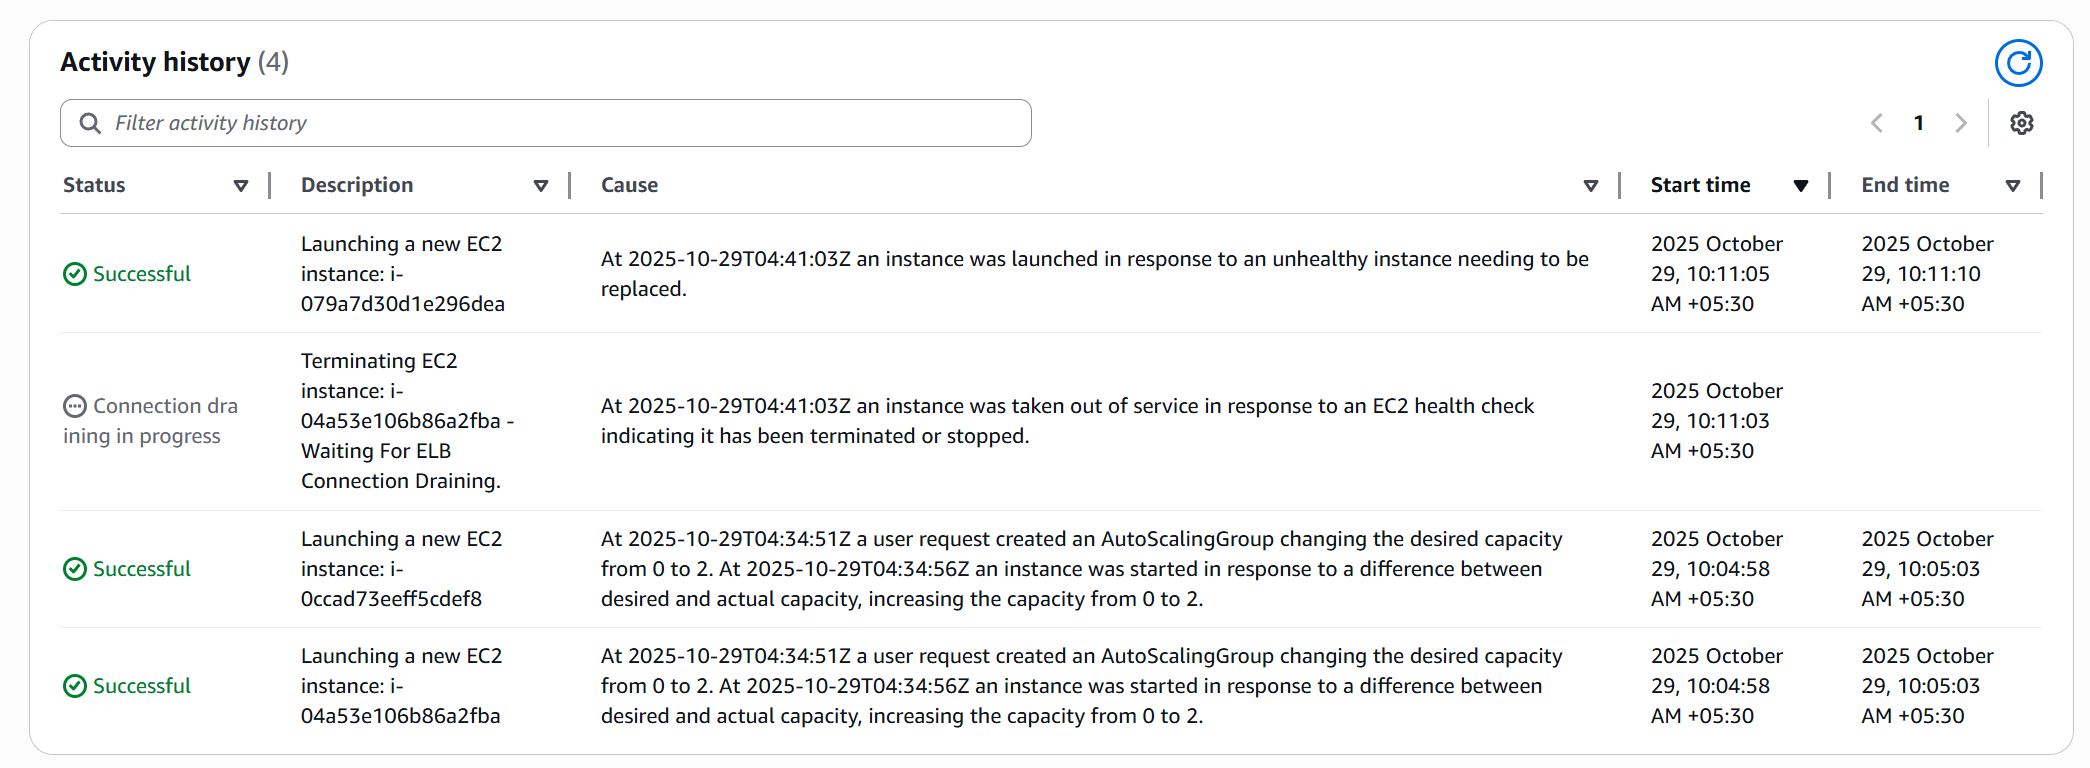
🧠 10. Test Auto-Healing
- Go to EC2 → Select one instance → Terminate.
- Open ASG → Activity History:
- One instance terminated.
- New instance automatically launched.
- Observe replacement in Pending → InService state.
📈 11. Experiment with Scaling
- Edit ASG Desired Capacity:
- Set to
1→ ASG terminates one instance. - Set to
4→ ASG launches two more instances.
- Refresh Target Group to confirm all instances are registered.
This manual apporach is kind of limited if we see.
✅ Summary
| Component | Description |
|---|---|
| Target Group | Registers EC2 instances for load balancing |
| Application Load Balancer | Distributes incoming traffic |
| Launch Template | Defines EC2 configuration and startup script |
| Auto Scaling Group | Automatically maintains desired instance count |
| Health Checks | Detect and replace unhealthy instances |